For those on Windows / Here we set up Laragon for convenient PHP development
2
FOR LINUX AND MAC USERS / Configuring PHP for local development (how to configure it on a production server, or if you want to tinker with nginx, see the module on vps)
3
Let’s figure out how to process simple web requests and make a simple multi-page website.
Before you start this task, you need to come up with a theme for your website.
It could be characters, movies, music, instruments, cars, trees, flowers—whatever you like. The main thing is that you can match an image and some kind of description to this object. For now, two examples of your theme will suffice.
I chose the theme of cosmic nebulae. My test subjects are the Andromeda Galaxy and the Orion Nebula.
4
Revise the website:
- Add additional pages with information about the object and a picture of the object.
- Create separate files for the new pages, which will be linked from the object page.
- Add links to all pages on the home page.
- The additional pages should show which menu item is selected.
The result should look something like this:

5
We connect the Twig template engine to work with markup more competently.
6
Refine your application by implementing controllers for all pages.
7
Rewrite the website from task 2 using Twig
- There must be at least two basic template templates, with a total of about 6 templates
- general template
- for the main page (inherits from the general template),
- for the object page (inherits from the general template),
- for the page with the object image (inherits from the object template)
- and for the page with information about the first instance of the object (inherits from the object template)
- and for the page with information about the second instance of the object (inherits the object template)
- Use a loop to display menu items on the main page
- [optional] Use a loop to display items in the navigation
8
Implement a macro to display a button in an active state. Macro call interface:
{{ btn("Button text", "url", true, "warning") }}
should generate the following markup
<a href="url" class="btn btn-warning">Button text</a>
if the third parameter is false, then display
<a href="url" class="btn btn-link">Button text</a>
if the fourth parameter is not specified, then for {{ btn("Text on button", "url", true) }} display a button in the primary style
<a href="url" class="btn btn-primary">Text on button</a>
Display the button using a macro in all places in your application where the button is displayed.
Create a sub-template for the list element on the main page and connect it using include.
Examples of working with include and macro can be found in the documentation [https://twig.symfony.com/doc/3.x/tags/include.html] (https://twig.symfony.com/doc/3.x/tags/include.html) and https://twig.symfony.com/doc/3.x/tags/macro.html
Как делать задание 1
So, in order to understand how the web works, we will use PHP. Being a kind of pioneer in the development of the modern web, using it will make it easier to understand why the web became what it is today, in terms of the transition from layout to layout with programming elements, and then to a full-fledged web application with MVC and so on. It’s the perfect option.
To work with PHP, we will use Laragon. This is a special program that allows you to deploy a web application from any folder without the need for administrator rights, and also allows you to install various services such as MySQL, Nginx, PHP, etc. You can carry it on a flash drive. And unlike a virtual machine, it works very quickly and takes up very little space.
So, go to the website https://github.com/leokhoa/laragon/releases/tag/6.0.0 download it and install:

After installatiion, you will get this:

Now download PHP. Go to https://windows.php.net/download#php-8.1 and download:

Save it inside the laragon-portable folder in the \bin\php subfolder:

And unzip it too

Then go to the Laragon settings and uncheck the box

That’s it. We have collected the necessary files and can now try to start the server.
Run the laragon.exe file

After launching, we will see this interface

Click the Start All button. If you see any requests to open access, just skip them.
Now you can open the site in your browser at http://localhost

Let’s go in and see what’s in the folder:

There is only one file there, and this file runs when we go to http://localhost.
In fact, the server is configured so that when we go to http://localhost, we are actually redirected to http://localhost/index.php.
Let’s take a look at what’s inside the file. Open index.php using Visual Studio Code.
At the very beginning of the file, we will see:
<?php
  if (!empty($_GET["q"])) {
    switch ($_GET["q"]) {
      case "info":
        phpinfo();
        exit;
      break;
    }
  }
?>
We won’t delve into how this works just yet. But without going into too much detail, the main difference between a php file and an html file is that we can insert php code directly into html, and it will be interpreted on the server side, with only plain html being sent to the client.
If we scroll further, we’ll see mostly plain html with small insertions of php code, for example:

Here again there are PHP code inserts, but they are more local. For example, <?php print($_SERVER["SERVER_SOFTWARE"]); ?> is replaced with nginx/1.14.0
and <?php print ($_SERVER["DOCUMENT_ROOT"]); ?> is replaced with the path to the folder where the index.php file is located.
Let’s take a look at the html that comes from the server (press Ctrl+U in your browser):
<body>
    <div class="container">
        <div class="content">
            <div class="title" title="Laragon">Laragon</div>

            <div class="info"><br />
                  nginx/1.14.0<br />
                  PHP version: 5.4.9   <span><a title="phpinfo()" href="/?q=info">info</a></span><br />
                  Document Root: D:/_MMK/_PHP/laragon-portable/www<br />

            </div>
<div class="opt">
<div><a title="Getting Started" href="http://laragon.org/?q=getting-started">Getting Started</a></div>
</div>
</div>

</div>
</body>
That is, in html, all these <?php ... ?> disappear and are replaced with plain text.
Since it is not a fact that you will be sitting at your computer, and you don’t want to install Laragon 10 times. Let’s just create a separate folder for our project and work with it.
It’s better to carry the folder itself on a flash drive or upload it to Git and pull it from there. So, let’s create a folder

open it with Visual Studio Code, create a file called index.php in it, and put the following code in it
<!DOCTYPE html>
<html lang="en">
<head>
    <meta charset="UTF-8">
    <meta http-equiv="X-UA-Compatible" content="IE=edge">
    <meta name="viewport" content="width=device-width, initial-scale=1.0">
    <title>Document</title>
</head>
<body>
    <div>Hello everyone</div>
    <div>PHP version: <?php print phpversion(); ?></div>
</body>
</html>
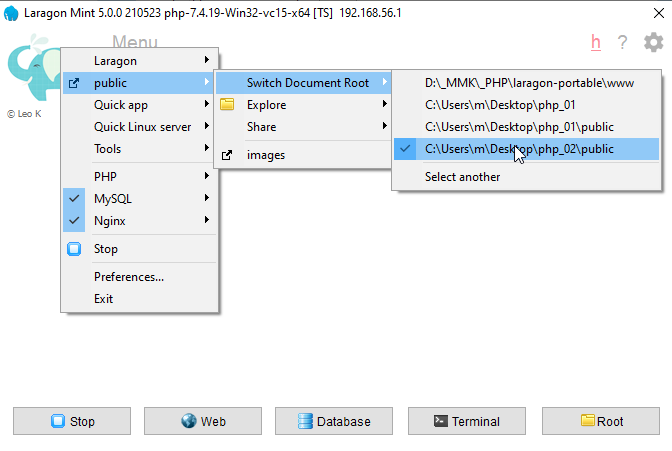
Now let’s configure Laragon to distribute this folder. To do this, right-click in the Laragon window and select Select another

and select

and now go to http://localhost, and check

Hooray! =)
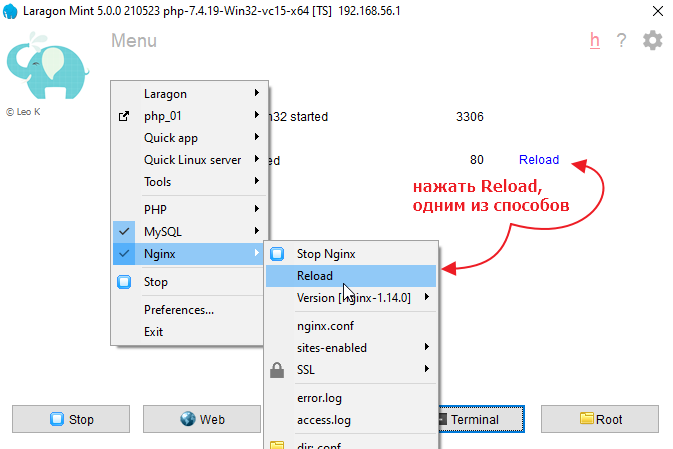
Now let’s switch the PHP version, since we downloaded it for a reason. Right-click in the Laragon window again.

Reload the page.

Great! Everything is set up, now we can study the subject in more depth! =)
Как делать задание 2
For Debian-based systems
To deploy PHP projects, you need to install PHP itself. Unfortunately, Ubuntu comes with the slightly outdated PHP version 7 by default.
Therefore, in order to keep up with progress, we will connect a third-party repository that contains the latest versions of PHP. The repository is supported by Ondrej Suri, a Debian developer, so the source is reliable.
In general, we write
sudo apt install software-properties-common
sudo add-apt-repository  ppa:ondrej/php
The first command installs a package that simplifies connecting third-party repositories, and the second actually connects the repository.
Press Enter when prompted.

Once the repository has been added and the cache has been updated, you can install PHP. Type the following (you can use a different version instead of 8.2)
sudo apt install php8.2-fpm -y
And wait for it to install.
php-fpm is not just a php compiler/interpreter, it is a whole service that can be connected to nginx and will automatically execute scripts and return the results of their processing back to the user.
For Macs
I haven’t tested it, but in theory, it should be enough to execute the command
brew install php
Here’s another useful link
Setting up the development process
In principle, you can deploy everything as for VPS, but for now, it is enough to configure PHP for local development. Check that PHP is installed correctly:

Install the PHP plugin in Visual Studio Code

Now you can create a folder with the project and create a file called index.php
in it.
<?php echo phpinfo(); ?>
Open the terminal and type
php -S localhost:3000
Like this

Now open http://localhost:3000 in your browser
And there you go:

You can start developing =)
Как делать задание 3
Let’s start with some history. Back in the day, when the web was still in its early stages of rapid development in the early 2000s and PHP was the main player in the web language market, people wrote code in it any way they wanted.
That’s when the negative attitude towards PHP developers as mostly low-skilled programmers started. The entry threshold was very low, websites were just a bunch of unrelated PHP files, and the code was scary to look at.
Fortunately, the web evolved, PHP evolved, and along with them, the requirements for developers grew, followed by the requirements for web application design. MVC architecture and its friends became the norm.
Therefore, we will try to quickly get through the stage of naive programming in PHP and move on to MVC architecture as quickly as possible.
Adding a new page
Let’s take a look at our project. We currently have one file there. Usually, websites have many different links. Let’s try to go to a link, for example, http://localhost/hello.
In response, we will get a 404 error.
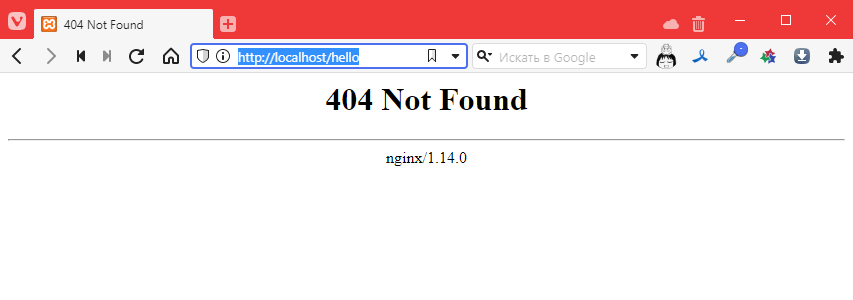
This means that the file does not exist. This is predictable, of course, but it’s disappointing.
So let’s add a file called hello.php with the following content:
<!DOCTYPE html>
<html lang="en">
<head>
    <meta charset="UTF-8">
    <meta http-equiv="X-UA-Compatible" content="IE=edge">
    <meta name="viewport" content="width=device-width, initial-scale=1.0">
    <title>Document</title>
</head>
<body>
    I'm a new page!!!1111 =)
</body>
</html>
Let’s try again http://localhost/hello
Hmm, still 404
What if we use this URL: http://localhost/hello.php
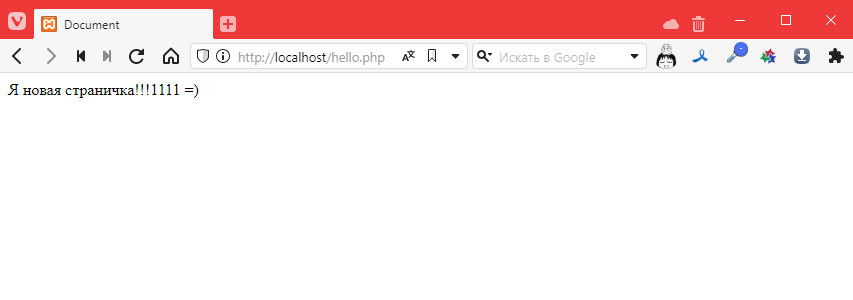
Oh! It worked! So it turns out that after http://localhost/ we need to specify the path to the php file. Okay…
Adding an image
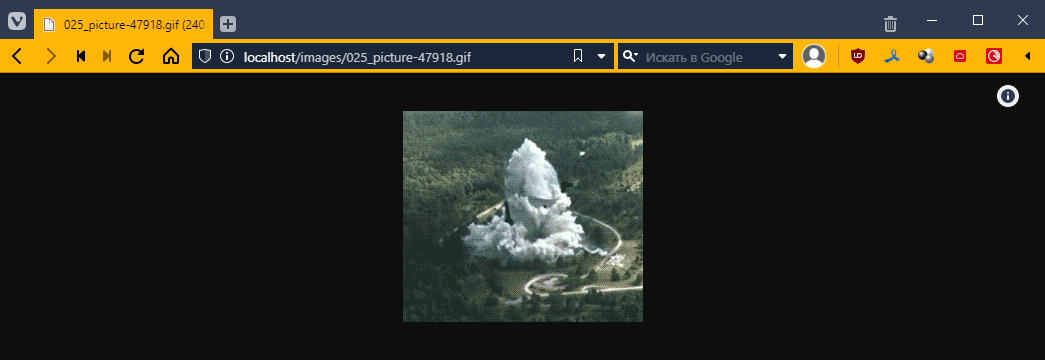
Let’s try adding an image. And let’s do it so that it’s stored on our server. Here’s one, for example:

Save it in the folder where the file is located, and it’s better to create a subfolder called images, like this:
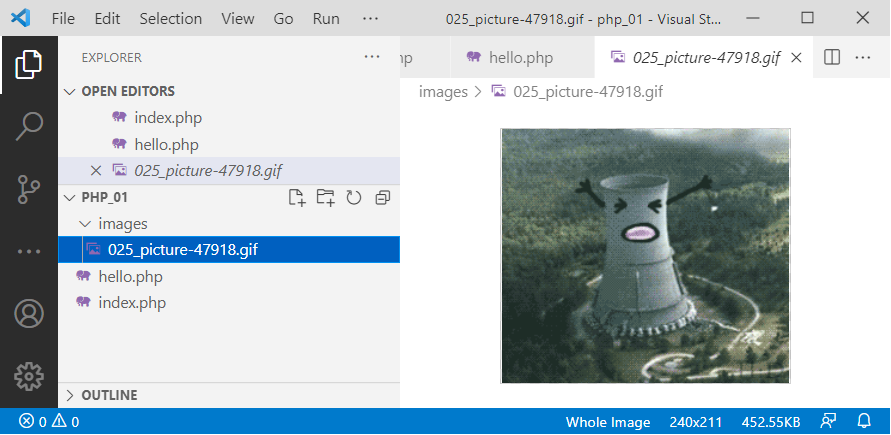
Now let’s connect it to the new page. To do this, we need to specify its path relative to the project folder. And the path MUST start with a forward slash / like this:
<!DOCTYPE html>
<html lang="en">
<head>
    <!-- … -->
</head>
<body>
    I'm a new page!!!1111 =)
    <br>
    <img src="/images/025_picture-47918.gif" alt="">
</body>
</html>
Let’s check:
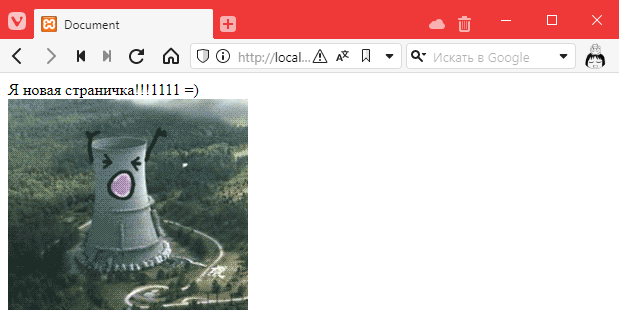
Hooray! =)
But then the question arises: why did PHP understand that this is an image and not interpret the file? After all, we can even open it via a direct link http://localhost/images/025_picture-47918.gif
What’s more, we can even open the folder (if we ran it on Linux via a local server): http://localhost/images/
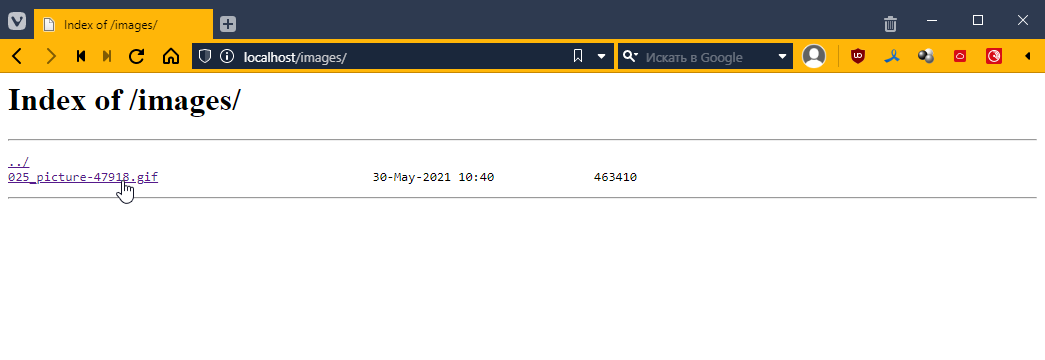
And this, comrades, is a security hole. Is php really doing all this?
Configuring Nginx If you are using Linux, you may skip this section.
However, this is not the case. In reality, it is not PHP that performs this task. In fact, when we write http://localhost/images/, requests do not go to PHP, but first to the Nginx web server (engine x — pronounced “nginx” in Russian, but for some reason I say “nginx”… it’s spelled the way it’s pronounced).
This is a special program that is not generally designed to execute any code; its main task is to redirect requests to different interpreters and distribute files. And it does this so masterfully that it can simultaneously serve tens of thousands of connections and distribute thousands of files. For which everyone loves it dearly *_*
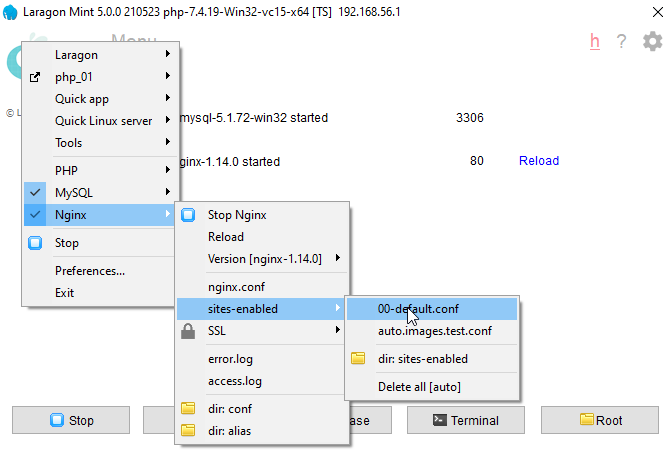
Let’s take a look at the settings of this very nginx
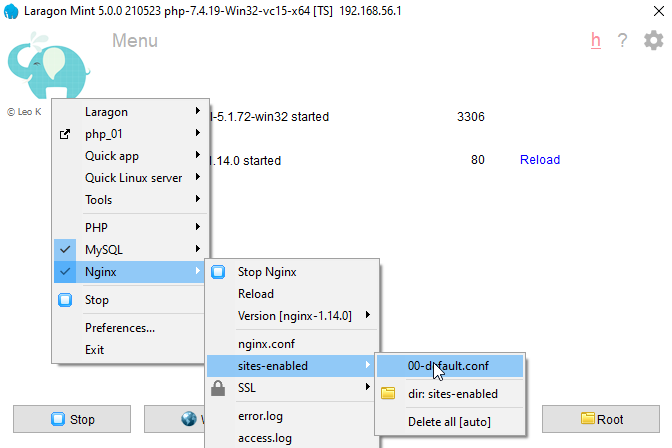
Since nginx can serve several sites at once, in the sites-enabled block, we can choose which site we want to configure. Since we are working with only one project and have not made any additional settings, we select 00-default.con, where we will see:
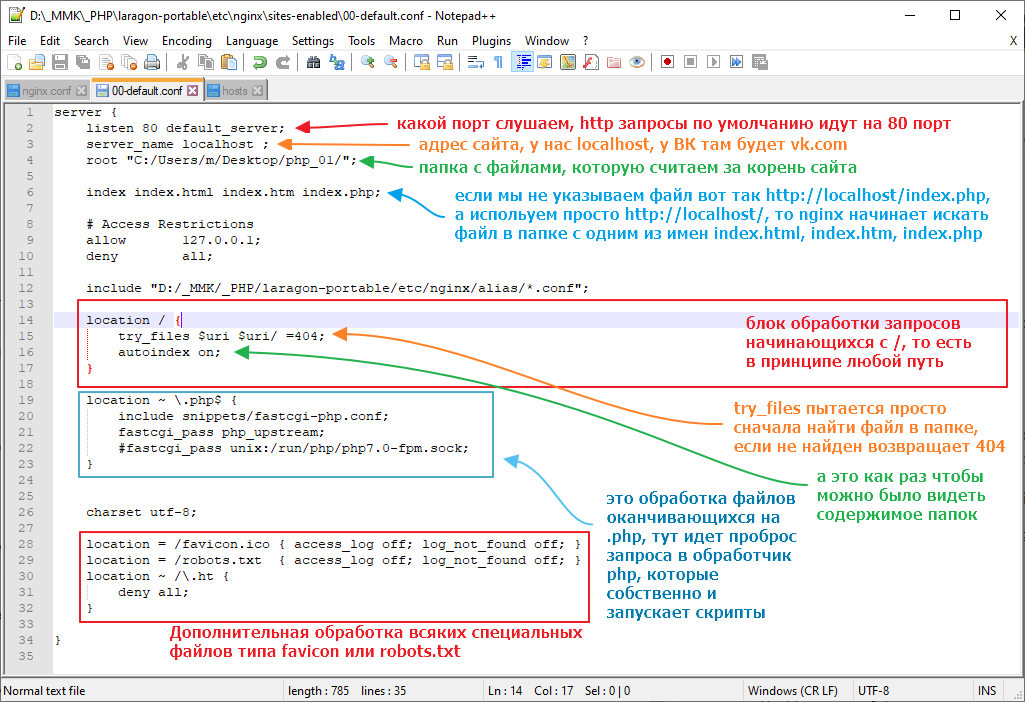
In general, the first thing we need to do is disable autoindex. You can set the value to off or simply comment out the line like this:

Now we need to restart nginx.
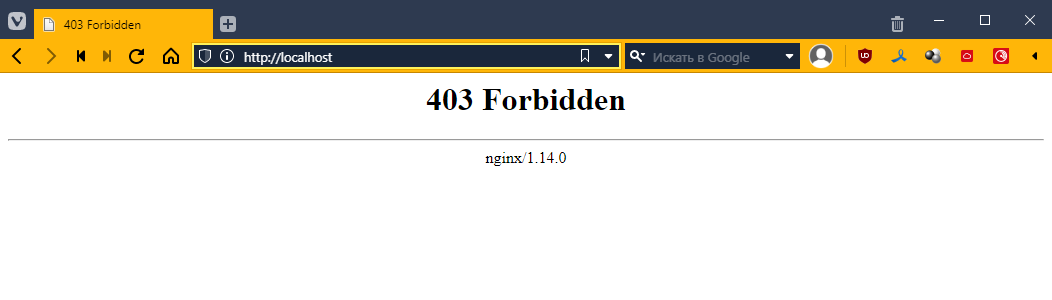
Let’s check:
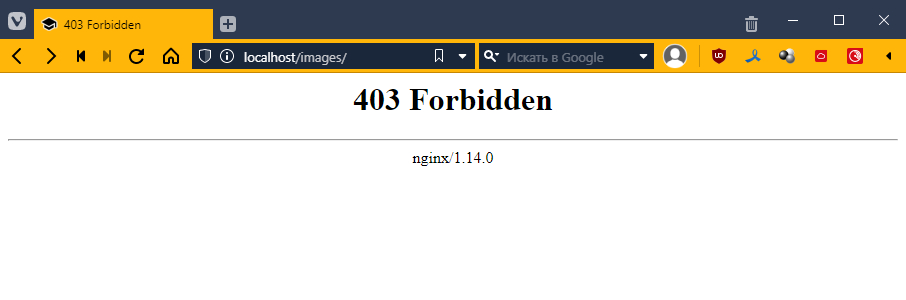
Forbidden — that is, prohibited, which is what we want =)
Now let’s do one more thing that may seem strange, but we will make it so that all requests, if the file is not found, go to index.php. To do this, we will correct the line with try_files:
We will write there
try_files $uri $uri/ /index.php$is_args$args;

Restart nginx again
Now let’s try to go to a page like http://localhost/page/about
Ideally, we should be redirected to index.php.
Let’s check:
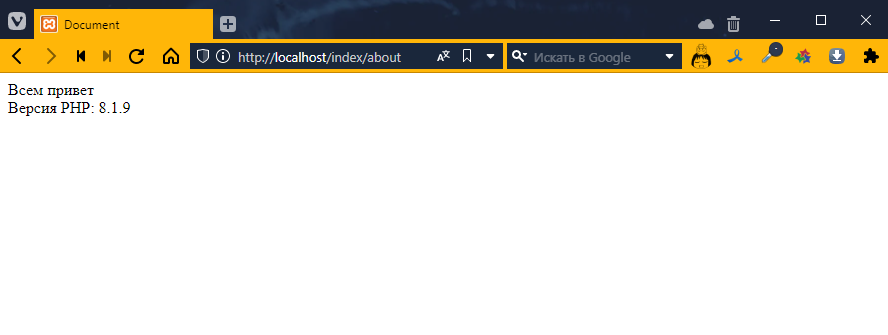
Perfect! =)
Let’s find out the request URL
What did this give us? It means that we now control all requests that do not go directly to regular files using a single index.php, which in turn allows us to manage the application in a more centralized manner.
Let’s take a look at how we can use the link information inside our index.php file
So, every time a php file is launched, it has access to a list of predefined variables https://www.php.net/manual/ru/reserved.variables.php
Let’s see what happens when we open a page with different addresses. Add the following to index.php:
<!DOCTYPE html>
<html lang="en">
<head>
    <!-- … -->
</head>
<body>
    <?php print_r($_SERVER) ?> <!-- added output of information about the $_SERVER variable -->
</body>
</html>
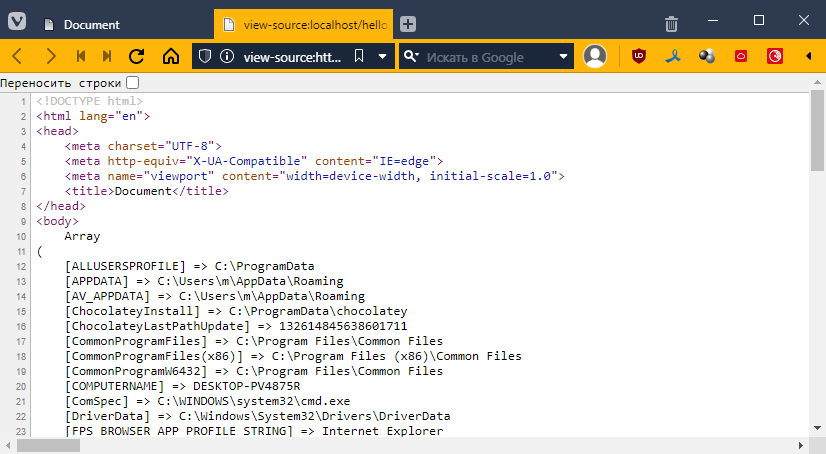
We will get this unreadable mess
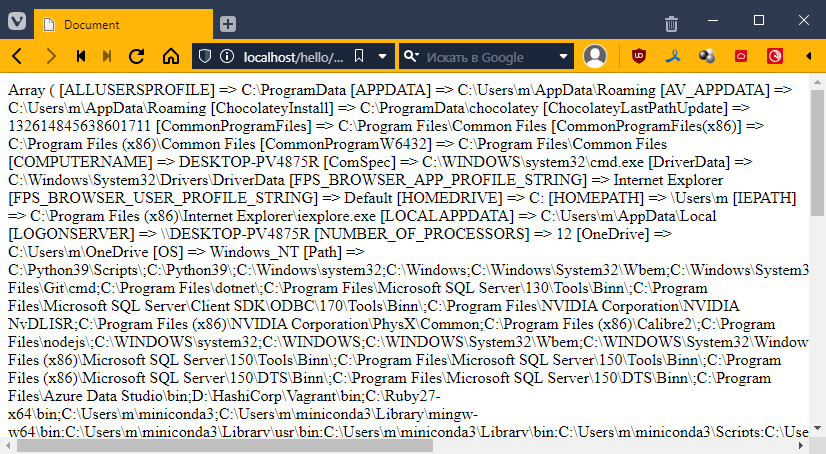
In fact, php formed a nice-looking response for us, but since the browser ignores all line breaks, it looks ugly.
You can even look at the page code (Ctrl+U) and see
Fortunately, HTML has a special pre tag that takes into account all line breaks and indents. I use it to display code in all my articles. In general, we just take our PHP insert and wrap it with the tag.
<body>
<pre>
    <?php print_r($_SERVER) ?>
</pre>
</body>
Run it and scroll until you find the REQUEST_URI item.
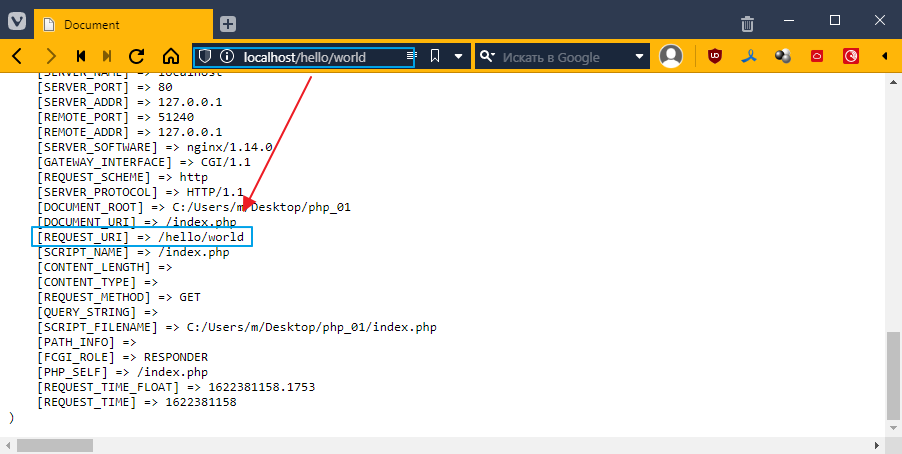
If you look closely, it says the same thing as in the browser line.
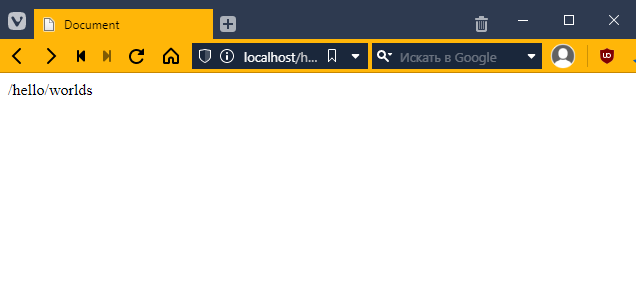
Let’s try to output this value separately.
$_SERVER is a dictionary, which means it has keys and values. To access it, use square brackets [], like this:
<body>
<pre>
    <?php print_r($_SERVER["REQUEST_URI"]) ?>
</pre>
</body>
Let’s see:
Cool! =) But what good is that to us?
Creating a menu
Let’s try to create a menu. Let’s say I have a website about galaxies and nebulae in the universe. Let’s say I have three pages. For example:
- Home
- Andromeda Galaxy
- Orion Nebula
Let’s create the menu.
Connecting Bootstrap
I will use Bootstrap. Go to the website https://getbootstrap.com/docs/5.2/getting-started/introduction/
and copy the CSS into the head file of index.php

It should look something like this
<!DOCTYPE html>
<html lang="en">
<head>
    <meta charset="UTF-8">
    <meta http-equiv="X-UA-Compatible" content="IE=edge">
    <meta name="viewport" content="width=device-width, initial-scale=1.0">
    <title>Document</title>
    <link href="https://cdn.jsdelivr.net/npm/bootstrap@5.2.0/dist/css/bootstrap.min.css" rel="stylesheet" integrity="sha384-gH2yIJqKdNHPEq0n4Mqa/HGKIhSkIHeL5AyhkYV8i59U5AR6csBvApHHNl/vI1Bx" crossorigin="anonymous">
</head>
<body>
    <?php print_r($_SERVER["REQUEST_URI"]) ?>
</body>
</html>
Now we need to insert the navigation menu. Again, you can copy it from the Bootstrap website. Go here https://getbootstrap.com/docs/5.2/components/navbar/#nav
and paste it into the body
<nav class="navbar navbar-expand-lg navbar-light bg-light">
<div class="container">
<a class="navbar-brand" href=""#>Navbar</a>
<button class="navbar-toggler" type="button" data-bs-toggle="collapse" data-bs-target="#navbarNav" aria-controls="navbarNav" aria-expanded="false" aria-label="Toggle navigation">
<span class="navbar-toggler-icon"></span>
</button>
<div class="collapse navbar-collapse" id="navbarNav">
<ul class="navbar-nav">
<li class="nav-item">
<a class="nav-link active" aria-current="page" href=""#>Home</a>
</li>
<li class="nav-item">
<a class="nav-link" href=""#>Features</a>
</li>
<li class="nav-item">
<a class="nav-link" href=""#>Pricing</a>
</li>
<li class="nav-item">
<a class="nav-link disabled" href=""# tabindex="-1" aria-disabled="true">Disabled</a>
</li>
</ul>
</div>
</div>
</nav>
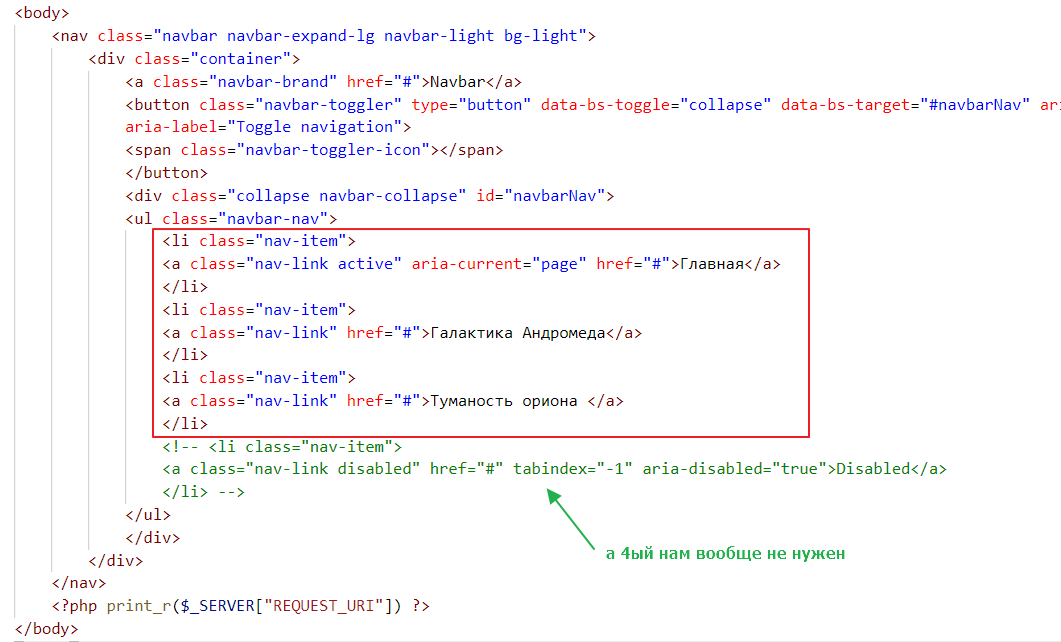
<?php print_r($_SERVER["REQUEST_URI"]) ?>
If we look closely, we can see that this block is responsible for the menu items
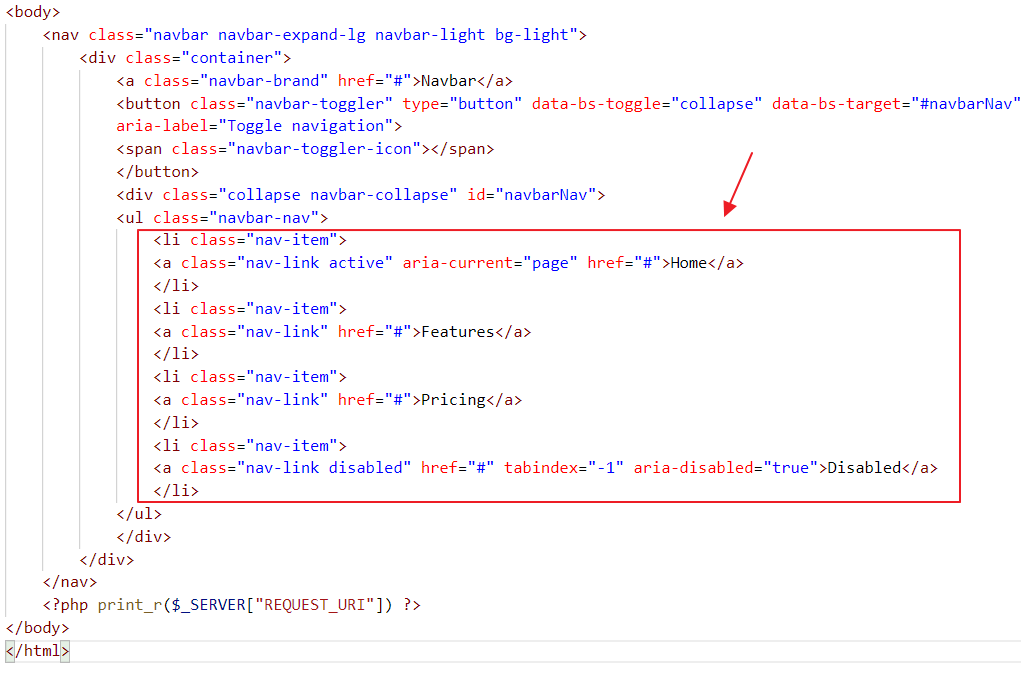
Let’s rewrite it so that only the items we need remain:
The result will be as follows:
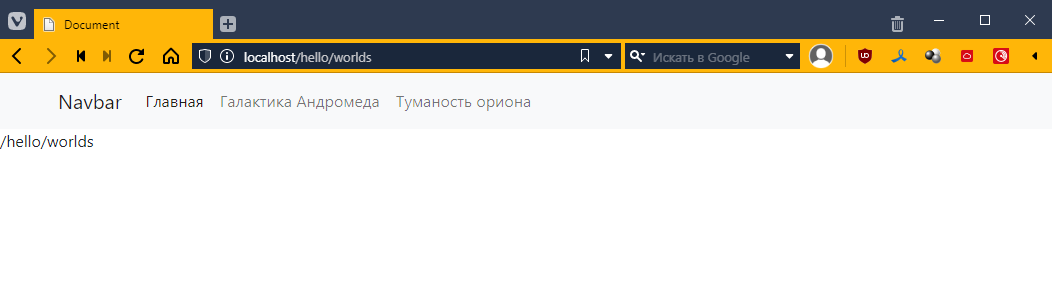
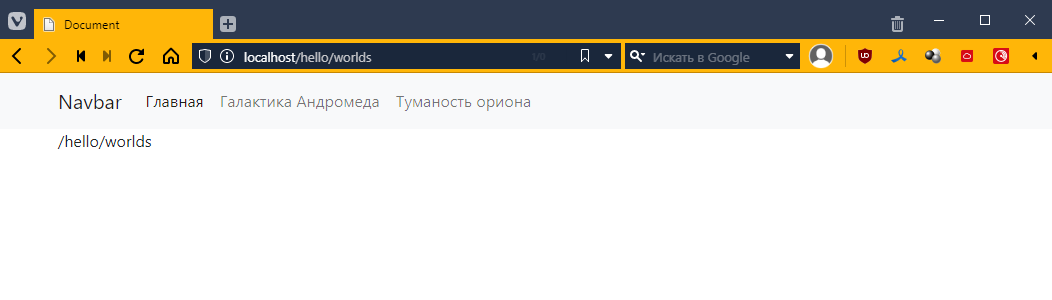
To align our /hello/words with the navigation, let’s wrap our instruction in the .container class, which is a special class in Bootstrap that adds margins around the edges. It is responsive, meaning that the margins are larger on larger screens, smaller on smaller screens, and may be absent altogether on phones.
Like this:
<nav class="navbar navbar-expand-lg navbar-light bg-light">
    <!-- ... -->
</nav>
<div class="container">
    <?php print_r($_SERVER["REQUEST_URI"]) ?>
</div>
Now it looks better
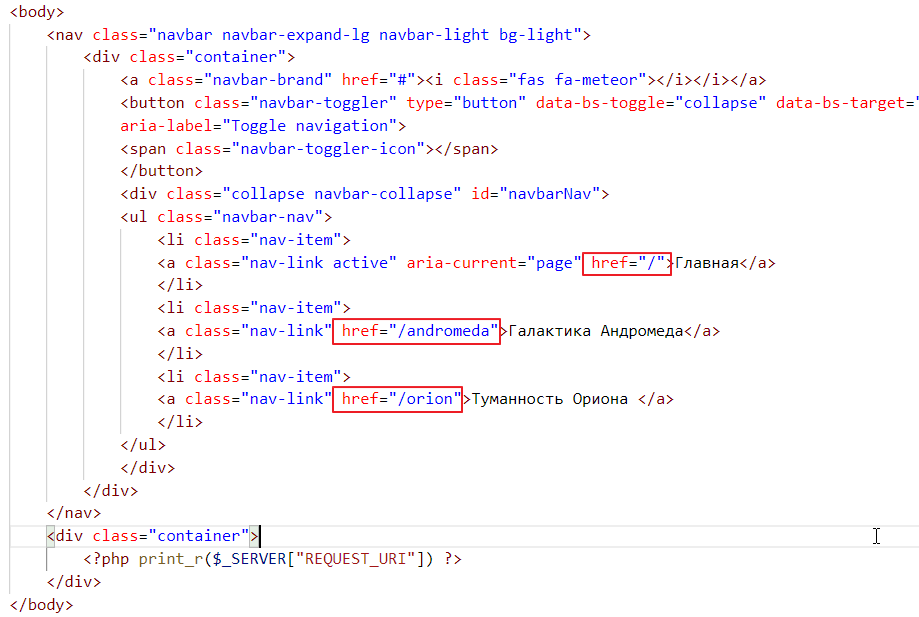
By the way, this Navbar inscription is actually a place for the site logo. Let’s connect fontawesome and put some icon there.
<head>
    <!-- ... -->
    <link href="https://cdnjs.cloudflare.com/ajax/libs/font-awesome/6.1.2/css/all.min.css"  rel="stylesheet" />
</head>
<body>
    <nav class="navbar navbar-expand-lg navbar-light bg-light">
        <div class="container">
            <!-- here, instead of Navbar, I put <i class="fas fa-meteor"></i> -->
            <a class="navbar-brand" href=""#><i class="fas fa-meteor"></i></a>
            <button class="navbar-toggler" type="button" data-bs-toggle="collapse" data-bs-target="#navbarNav" aria-controls="navbarNav" aria-expanded="false" aria-label="Toggle navigation">
            <span class="navbar-toggler-icon"></span>
            </button>
            <div class="collapse navbar-collapse" id="navbarNav">
            <ul class="navbar-nav">
                <!-- ... -->
            </ul>
            </div>
        </div>
    </nav>
    <div class="container">
        <?php print_r($_SERVER["REQUEST_URI"]) ?>
    </div>
</body>
Let’s check:

Now let’s make it so that when we click on different menu items, different text appears at the bottom. In principle, it’s quite simple. All we need to do is write the URL for each menu item. We write:
Now let’s try clicking:
Great! =)
Formally, we are not switching pages, but it looks as if we are. Don’t let that confuse you; this is how 99% of websites in the world work.
Managing content
Now let’s try to display something. For example, the main page will have a list of links to all pages (sort of like duplicating the navigation), and the nebula pages will have pictures.
Method #1
This is the worst way to do it, never do it this way, but in principle it is the most natural. We will simply check the value of the variable $_SERVER["REQUEST_URI"] and, depending on the value, display one piece or another.
PHP does not limit us in this kind of writing, it supports if, and it is done like this:
<body>
    <nav class="navbar navbar-expand-lg navbar-light bg-light">
        <!-- ... -->
    </nav>
    <div class="container">
        <?php if ($_SERVER["REQUEST_URI"] == "/") { ?>
            You are on the main page! =)
        <?php } elseif ($_SERVER["REQUEST_URI"] == "/andromeda") { ?>
            Here we will tell you about the magical Andromeda Galaxy.
        <?php } elseif ($_SERVER["REQUEST_URI"] == "/orion") { ?>
            There was a cat, and he carried the galaxy in Orion's belt.
        <?php } ?>
    </div>
</body>
That is, we wrap the logic in <?php ... ?> and place the output in the browser as if it were the body of an if statement.
It kind of works, but it’s very difficult to read and takes a long time to write.
Method #2
It’s about as poor as the first one, but there’s less to write. Instead of writing a bunch of PHP wrappers, you make one and put everything in it. It looks like this
<nav class="navbar navbar-expand-lg navbar-light bg-light">
    <!-- ... -->
</nav>
<div class="container">
    <?php
    if ($_SERVER["REQUEST_URI"] == "/") {
        echo "You are on the main page! =)<br>";
        echo "<b>And I can print the markup</b>";
    } elseif ($_SERVER["REQUEST_URI"] == "/andromeda") {
        echo "Here we will tell you about the magical Andromeda Galaxy";
    } elseif ($_SERVER["REQUEST_URI"] == "/orion") {
        echo "There was a cat, and he carried the galaxy in Orion's belt";
    }
    ?>
</div>
PHP has a special echo operator that inserts the specified text into the content of the HTML response, or more correctly, into the content of the web response, because the response is not always an HTML file; it can also be some kind of JSON or even an image, or just a simple file.
By the way, nothing prevents us from declaring variables and using them:
<?php
$url = $_SERVER["REQUEST_URI"]; // we put $ on the left side of the variable in PHP

if ($url == "/") { // and when accessing it too
    echo "You are on the main page! =)<br>";
    echo "<b>And I can print the markup</b>";
} elseif ($url == "/andromeda") {
    echo "Here we will tell you about the magical Andromeda Galaxy";
} elseif ($url == "/orion") {
    echo "There was a cat, and he carried the galaxy in Orion's belt";
}
?>
It may seem unusual to use the dollar sign, but there are advantages to it. In PHP, you can quickly insert a variable into a string, for example, like this:
<?php
$url = $_SERVER["REQUEST_URI"];

echo "You are on the page: $url, please be careful!<br>"; // the value $url will be substituted for url

if ($url == "/") {
    echo "You are on the main page! =)<br>";
    echo "<b>And I can print the markup</b>";
} elseif ($url == "/andromeda") {
    echo "Here we will tell you about the magical Andromeda Galaxy";
} elseif ($url == "/orion") {
    echo "There was once a cat, and he carried the galaxy in Orion's belt";
}
?>
It seems cool, but if you need to output at least a couple dozen lines, it will become impossible to read. Therefore:
Method #3
This is the most effective approach, at least if we are using basic PHP. The idea is to create separate files for subpages and display their content depending on the address.
Let’s create a separate folder called “views,” create three files in it, and put the page content in the files, like this:
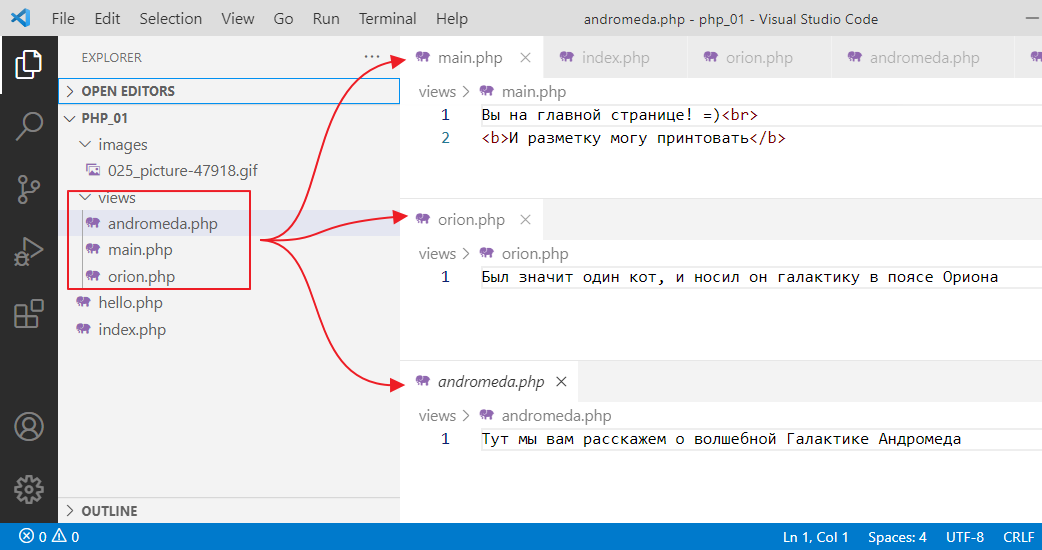
Now let’s make it so that our index.php displays the contents of these files depending on the URL. To do this, we will use another special operator, require, which simply takes and inserts what is inside the file specified after the operator:
<div class="container">
    <?php
    $url = $_SERVER["REQUEST_URI"];

    echo "You are on the page: $url, please be careful!<br>";

    if ($url == "/") {
        require "views/main.php";
    } elseif ($url == "/andromeda") {
        require "views/andromeda.php";
    } elseif ($url == "/orion") {
        require "views/orion.php";
    }
    ?>
</div>
Let’s check:
It works the same way, but now we can create content of any complexity in separate files! =)
Configuring security
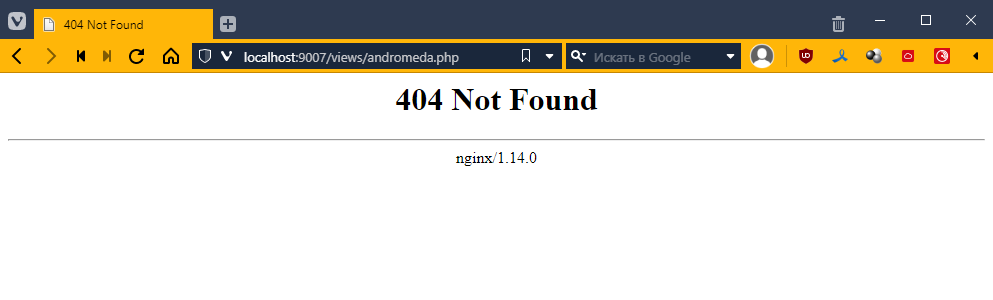
Another subtle point. Of course, everything works for us, and there are no errors, but in fact, there is a vulnerability in our code. A potential attacker could gain access to separate parts of our program.
For example, they could go to http://localhost/views/orion.php and see the contents of the orion.php file
What’s the big deal, you might ask? The thing is, when developing a real application, your files may contain information that you would not want to show to an outside user. Or some script that, when executed from outside index.php, may behave unpredictably.
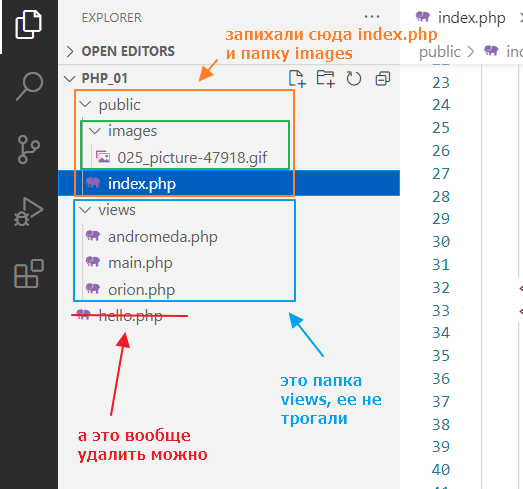
That’s why all modern web engines recommend creating a separate public folder to store index.php, all kinds of images, styles, and so on. Let’s configure our application to work this way:
Attempting to open http://localhost will give us
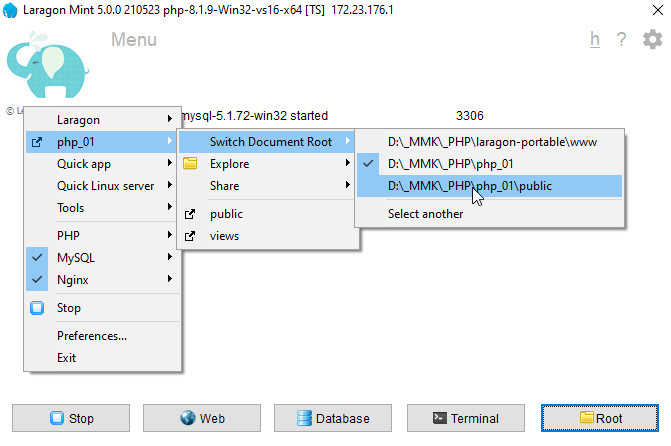
For Windows
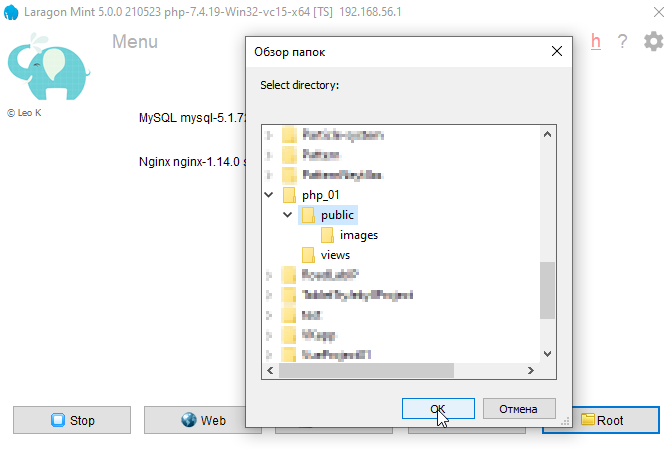
Now we need to configure Laragon to use the public folder as the root folder. Go to Laragon,
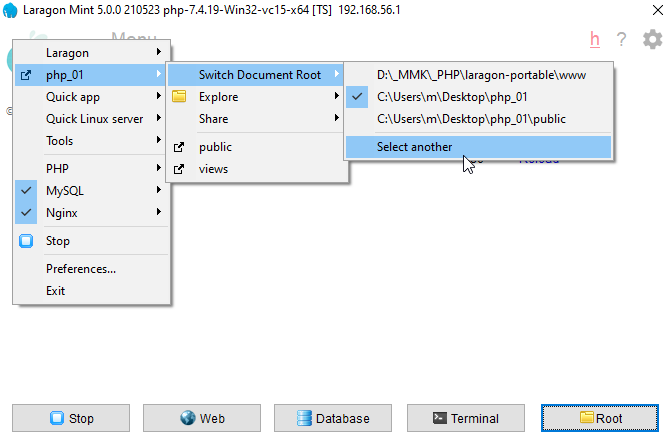
select the public folder
That seems to be all, but the problem is that Laragon has reset our nginx settings. Let’s go there and take a look:
Let’s see
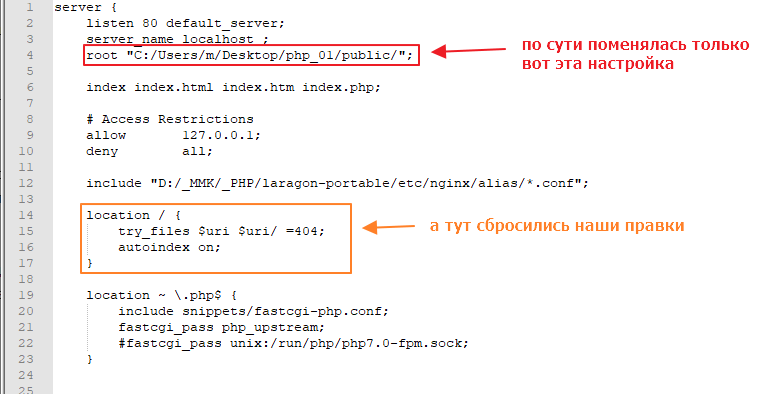
So that these settings are not lost, we need to tweak the Laragon template that it uses to recreate the 00-default.conf file when you switch folders. Go to the folder where you installed Laragon and go to /usr/tpl
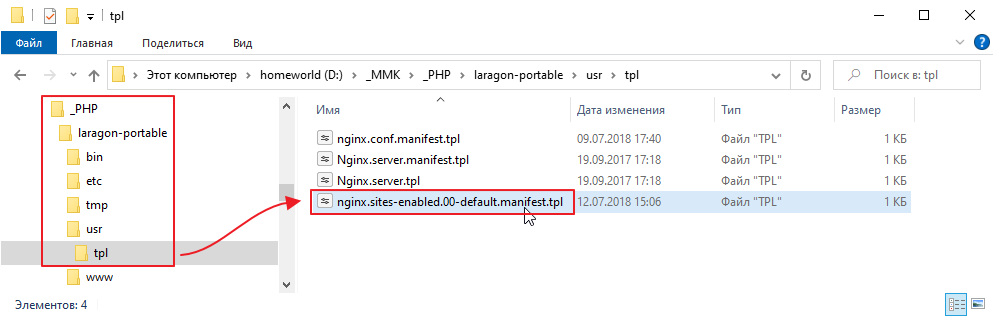
Open the file nginx.sites-enabled.00-default.manifest.tpl and edit its location so that it is the same as we configured last time:
server {
     ...

    location / {
        try_files $uri $uri/ /index.php$is_args$args; # added
        # and commented this out or you can delete it altogether
        #try_files $uri $uri/ =404;
        #autoindex on;
    }

   ...
}
Now switch back to php_01 and then back to php_01\public
On Linux
Just start the local server specifying the public folder
php -S localhost:3000 -t public
Testing
Let’s check:
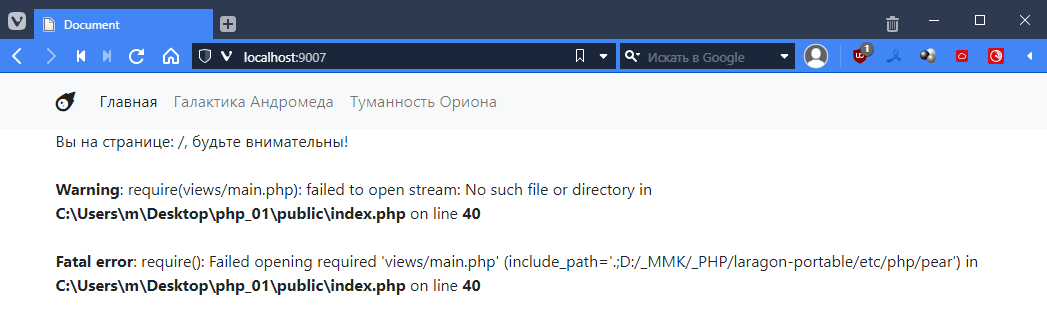
Hooray! It works! But there are a lot of errors. That’s understandable, because in index.php the paths are relative to index.php, and we need it to go to the folder above. So let’s go to index.php and fix it
<!DOCTYPE html>
<html lang="en">
<head>
    <!-- ... -->
</head>
<body>
    <nav class="navbar navbar-expand-lg navbar-light bg-light">
        <!-- ... -->
    </nav>
    <div class="container">
        <?php
        $url = $_SERVER["REQUEST_URI"];

        echo "You are on page: $url, please be careful!<br>";

        if ($url == "/") {
            require "../views/main.php"; // << added ../, which means search for the file in the folder one level above
        } elseif ($url == "/andromeda") {
            require "../views/andromeda.php"; // << and here
        } elseif ($url == "/orion") {
            require "../views/orion.php"; // and here
        }
        ?>
    </div>
</body>
</html>
Let’s test it.
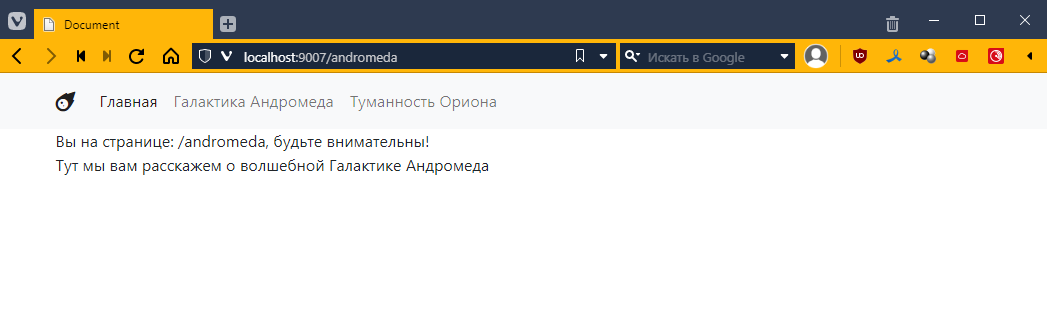
Awesome! =)
And the best part is that now no one can view the contents of a separate php file.
That’s how it is *______*
Как делать задание 4
Checking a string for partial match
By the way, you will most likely need to check for a partial match rather than a complete match. For example, we can check that a URL begins with the word “andromeda”
if (preg_match("#^/andromeda#", $url)) {
    require "../views/andromeda.php";
}
Here we use a regular expression. This may be clearer:

Creating a file hierarchy
When organizing files in a project, you should follow this approach:
1) index.php is the entry point of your web application
2) only the index.php file contains html tags, body tags, and a header with navigation
3) the index.php file is divided into two main areas

In turn, each andromeda or orion file should be responsible only for its own markup and have approximately the following structure

Instead of putting both the description and the image in one file, as in the example above, it is better to put them in separate files. For example, the andromeda file should decide which file to connect via require based on the variables is_image and is_info (just like in index.php). The result should be a file structure similar to the following:

Highlighting the active element
The question will most likely arise of how to implement highlighting of the active element so that it works like this:

First, the Bootstrap element https://getbootstrap.com/docs/5.2/components/navs-tabs/#pills is used here.
The idea is as follows:

We need to add this class dynamically. From a code perspective, we need to insert a condition into the markup:

It turns out that when the URL is equal to the link to the image, we need to add the active class. And it will even work. But it’s not really readable =)
So the first thing we can do is move the logic to a separate PHP block, somewhere higher up, something like this:
<?php
    // declare a variable that is True if the address matches the address of the page with the image
    $is_image = $url == "/andromeda/image";
?>

<ul class="nav nav-pills">
  <li class="nav-item">
     <!-- and now we check the value of this variable -->
    <a class="nav-link <?php if ($is_image) { ?>active<?php } ?>" href="/andromeda/image">
        Image
    </a>
  </li>
  <!-- ... -->
</ul>
That’s better. But it’s still not very readable. Let’s replace the two <?php … ?> blocks with one using echo:
<ul class="nav nav-pills">
  <li class="nav-item">
    <a class="nav-link <?php if ($is_image) { echo "active"; } ?>" href="/andromeda/image">
        Picture
    </a>
  </li>
  <!-- ... -->
</ul>
A little better, but in fact, it can be simplified to this:
<ul class="nav nav-pills">
  <li class="nav-item">
    <a class="nav-link <?= $is_image ? "active" : "" ?>" href="/andromeda/image">
        Picture
    </a>
  </li>
  <!-- ... -->
</ul>
Here, a special simplified block <?= ... ?> is used, which is essentially an echo instruction inside. That is, if you can put any expression into it, it will work like
<?php echo $is_image ? "active" : "" ?>
Elements on the main page
I don’t think there will be any questions about the elements on the main page. I used https://getbootstrap.com/docs/5.2/components/list-group/ for the list

and https://getbootstrap.com/docs/5.2/components/buttons/ for the page titles

And to keep everything from sticking together, I used classes for indents https://getbootstrap.com/docs/5.2/utilities/spacing/#margin-and-padding
Как делать задание 5
Let’s continue along the path of PHP application development.
Modern web applications are very sensitive to code organization.
PHP was primarily criticized for the fact that it does not separate layout from code, and as the complexity of the application grows, it turns into a mess.
To solve this problem, it was decided that PHP files should contain only code. And the markup should be stored separately somewhere else.
Let’s try to do this.
Let’s create a new project.
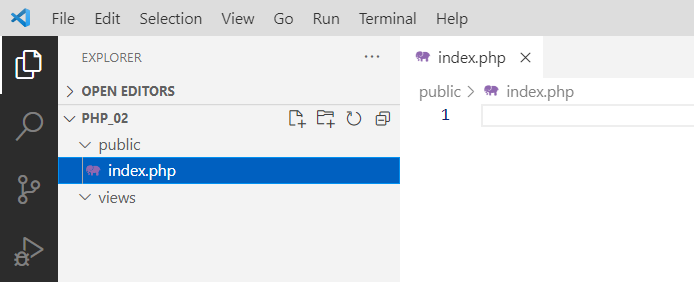
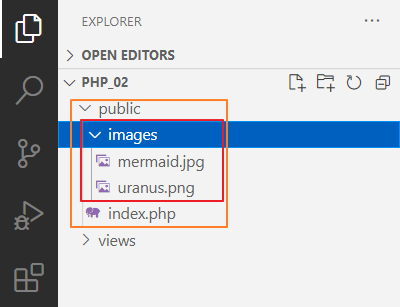
That is, two folders: public and views. The views folder is empty, and the public folder contains our entry point, index.php.
We are creating this project purely for the purpose of understanding. Later, we will need to return to the previous one. So, do not delete it under any circumstances. You will have to repeat everything we are doing here on it.
Switch to the new project
So, we decided that there should be no layout in php files. This means we will put the layout in the views folder and use simple html files.
Let’s take the images mermaid.jpg uranus.png and put them in the images folder
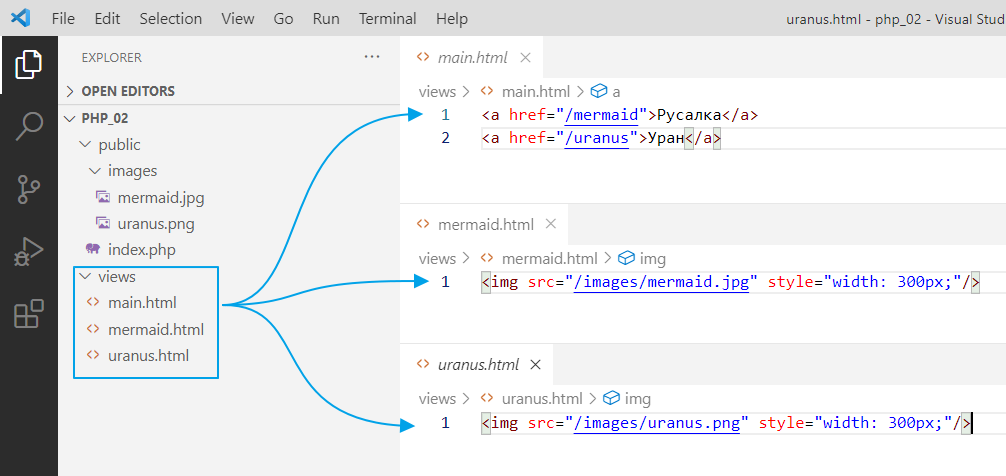
And we’ll make the files
And everything seems to be fine. Separate files, separate code.
But now another problem arises. How can I make navigation so that I write less code? Or how can I, for example, transfer data to an html file and have it processed, but without having to write php code?
In general, to solve this problem, so-called Templates engines were invented, that is, template engines in Russian.
In addition to simplifying the writing of dynamic elements (such as adding the active class in the previous task), template engines also add the ability to build a hierarchy of templates, i.e., to implement inheritance.
For example, you have a basic page template that includes navigation, a block for general content, and a footer. Now you want to create a news page. You simply create a file, specify that you are inheriting from the basic template, and redefine the display of the content block. And that’s it!
Twig
We will use one of the most popular template engines, namely Twig https://twig.symfony.com.
To start using it, you must first install it. A special utility called composer is used to install additional packages in PHP. It downloads additional libraries from the Internet and places them in the vendor folder.
In general, we click on Terminal.

This will launch the console with the configured environment variables.
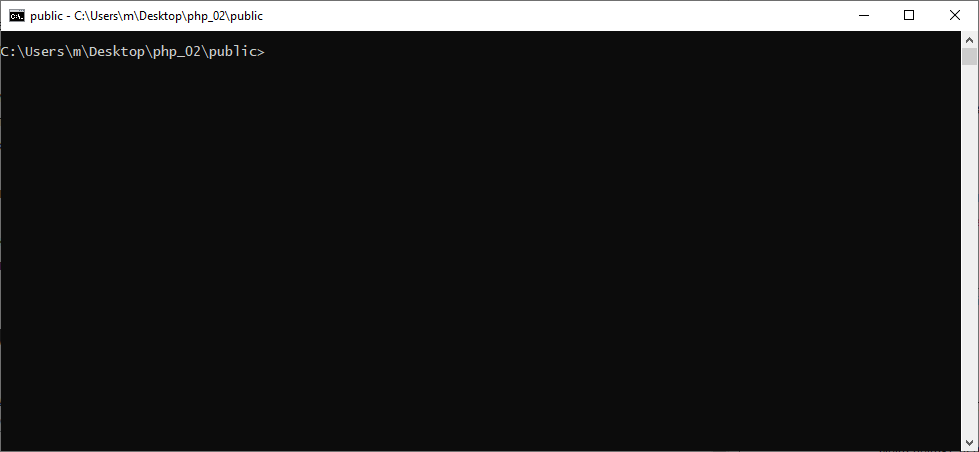
There is an important point here: the path written in this line must correspond to the folder where your project is located.

If for some reason there is a different path there, you need to go to the folder with your project in the console.
To do this, find the folder with your project. Copy the path to this folder
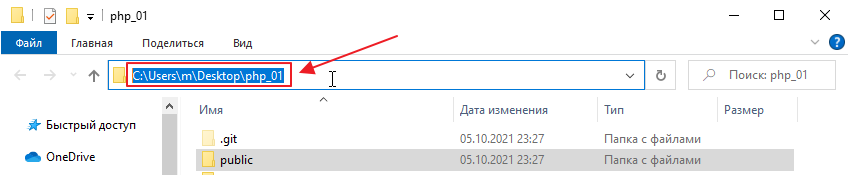
and enter the command in the console
cd P:\path\to\folder\with\your\project
In my case, it will be
cd C:\Users\m\Desktop\php_01
Now you can try typing composer and see what it outputs:

Here is some information on how to manage the library, in case anyone finds it useful
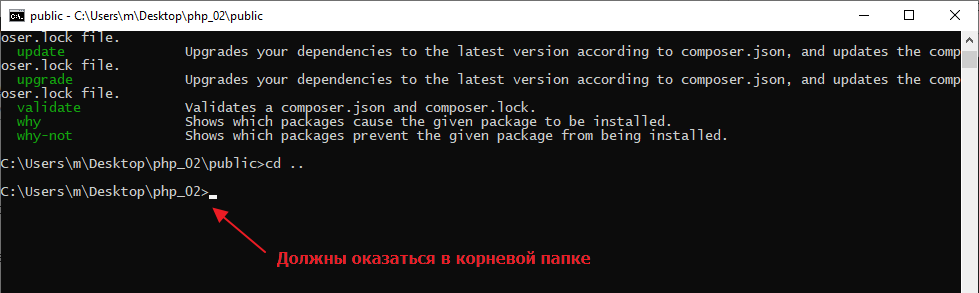
One thing is important here: since composer places packages in the current folder by default, for security reasons, you must exit the public folder if your path ends with public

Then run the following command to go up one level:
cd ..
Now go to the twig website https://twig.symfony.com/doc/3.x/intro.html#installation and see how to install twig correctly.
Here’s what it says:

That is, you need to enter the command.
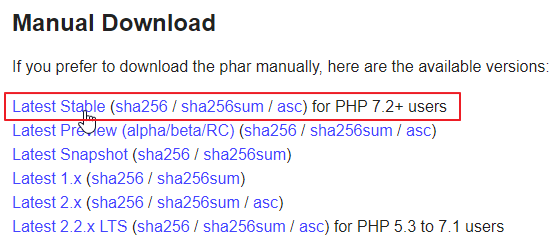
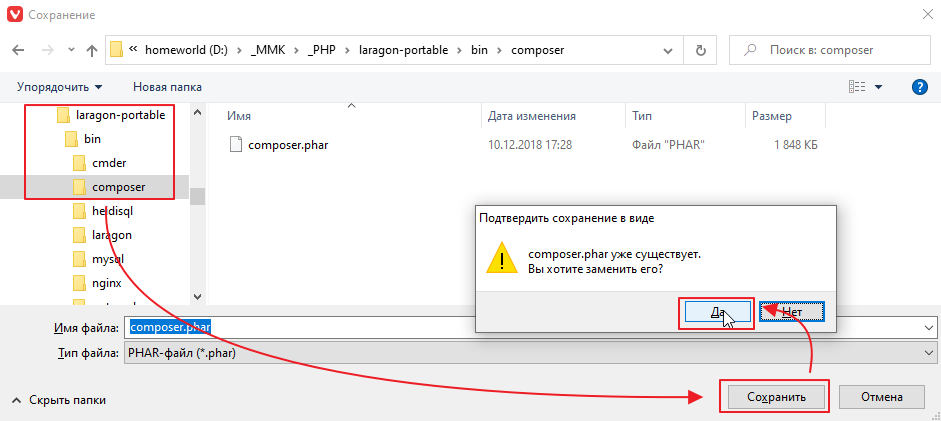
Unfortunately, the version of Composer that comes with Laragon is outdated, so you will have to update it. Go to the website https://getcomposer.org/download/, scroll down, download the latest version, and save it to the laragon-portable\bin\composer folder.
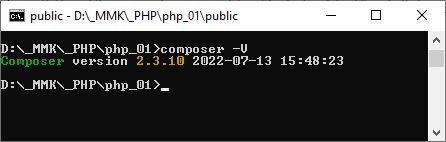
After downloading, check the version in the Laragon console
composer -V
It should display a more or less current date
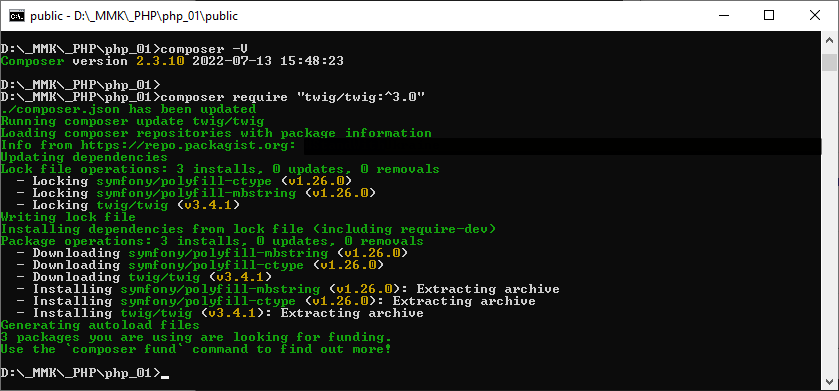
Now you can try running the installation command.
composer require “twig/twig:^3.0”
However, the internet at the polytechnic works through a proxy, so you first need to configure the proxy in the console. To do this, first enter the command to set the environment variable, and then the installation command.
set http_proxy=172.27.100.5:4444
composer require “twig/twig:^3.0”
and wait for it to install
and see what we have in the folder
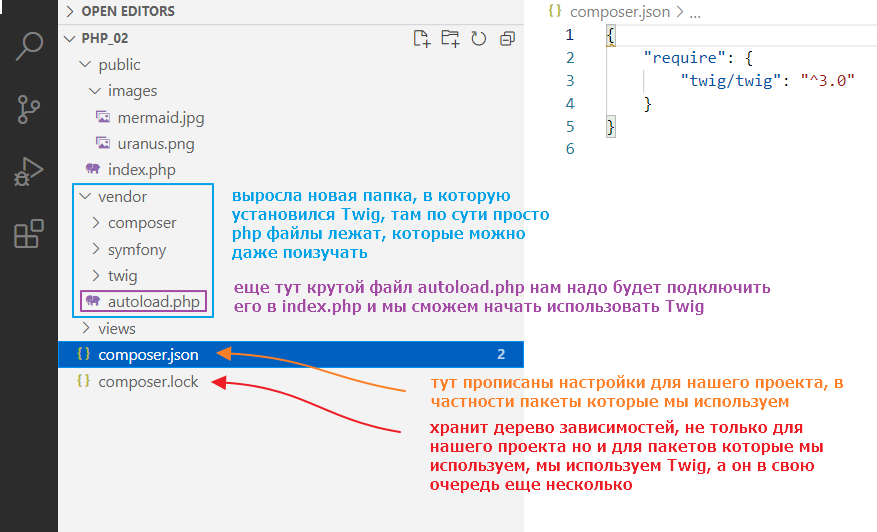
Now let’s try using twig.
Open index.php and write
<?php

// connect the packages that were installed via composer
require_once ‘../vendor/autoload.php’;

// create a template loader and specify the folder with templates
// \Twig\Loader\FilesystemLoader -- it's like writing Twig.Loader.FilesystemLoader in C#,
// only with a slash instead of dots
$loader = new \Twig\Loader\FilesystemLoader(‘../views’);

// create an instance of Twig that will be used for rendering
$twig = new \Twig\Environment($loader);

$url = $_SERVER[“REQUEST_URI”];

// ..
By the way, if class names are highlighted in red, install the PHP Intelephense plugin.
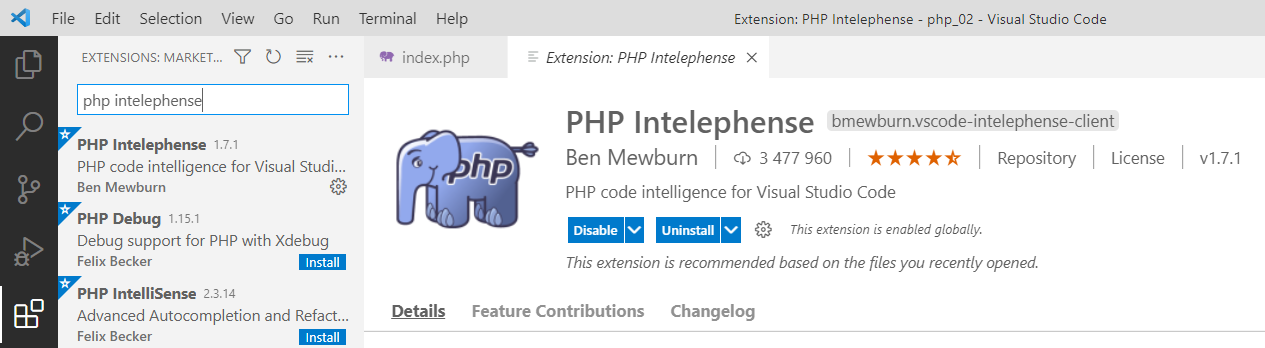
After installation, close and reopen Studio so that it picks up the Twig classes.
Rendering with twig
The general idea is that instead of connecting files with require, we will call twig commands, and it will render the files for us. This is done as follows:
<?php

// ...

$url = $_SERVER[“REQUEST_URI”];

if ($url == “/”) {
    // remove this require “../views/main.html”;

    echo $twig->render(“main.html”);
} elseif (preg_match(“#/mermaid#”, $url)) {
    // and this too require “../views/mermaid.html”;

    echo $twig->render(“mermaid.html”);
} elseif (preg_match(“#/uranus#”, $url)) {
    // and this require “../views/uranus.html”;

    echo $twig->render(“uranus.html”);
}
No particular advantages are apparent yet, except that you don’t need to write ../views/.
You can try it out to see how it works. In theory, it should work as usual:
Let’s immediately install a plugin for working with twig.
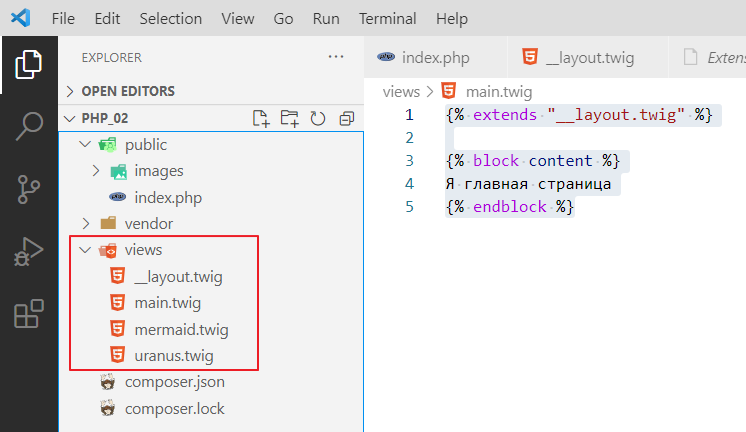
Now, let’s make a basic layout template and call it __layout.twig.
Let’s put the standard HTML markup there (using ! + Tab).
<!DOCTYPE html>
<html lang="en">
<head>
    <meta charset="UTF-8">
    <meta http-equiv=“X-UA-Compatible” content="IE=edge">
    <meta name="viewport" content="width=device-width, initial-scale=1.0">
    <title>Document</title>
</head>
<body>
    <!-- but with a small edit, this will be the place for individual page code -->
    {% block content %}
        emptiness
    {% endblock %}
</body>
</html>
Now let’s apply this template to our pages. First, go to main.html and make the following changes:
{% extends “__layout.twig” %}

<a href="/mermaid">Mermaid</a>
<a href="/uranus">Uranus</a>
Let’s check:
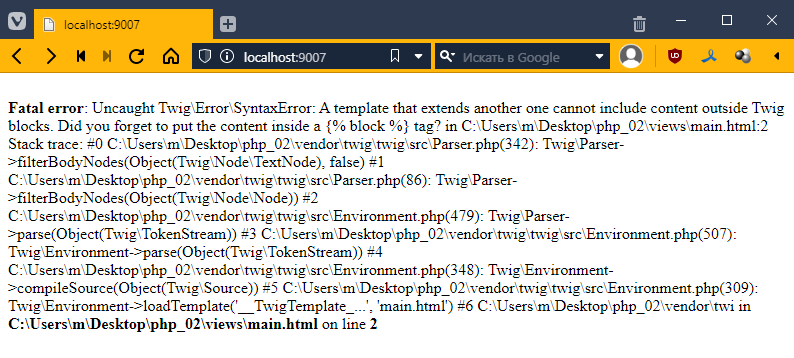
We get an error saying that our markup in main.html is outside of a block defined in the template. Let’s put it in like this:
{% extends “__layout.twig” %}

{% block content %}
<a href="/mermaid">Mermaid</a>
<a href="/uranus">Uranus</a>
{% endblock %}
Now it renders.
But it’s still not impressive… What’s the big deal?
Patience, my friend! =O
Now let’s do the same with the other files, with mermaid.html
{% extends “__layout.twig” %}

{% block content %}
<img src="/images/mermaid.jpg" style="width: 300px;"/>
{% endblock %}
and uranus.html
{% extends “__layout.twig” %}

{% block content %}
<img src="/images/uranus.png" style="width: 300px;"/>
{% endblock %}
Now let’s work some magic and add navigation to our base template:
<!DOCTYPE html>
<html lang="en">
<head>
    <meta charset="UTF-8">
    <meta http-equiv="X-UA-Compatible" content="IE=edge">
    <meta name="viewport" content="width=device-width, initial-scale=1.0">
    <title>Document</title>
</head>
<body>
    <div><!-- добавил -->
        <a href="/mermaid">Русалка</a>
        <a href="/uranus">Уран</a>
    </div>
    {% block content %}
        пустота
    {% endblock %}
</body>
</html>
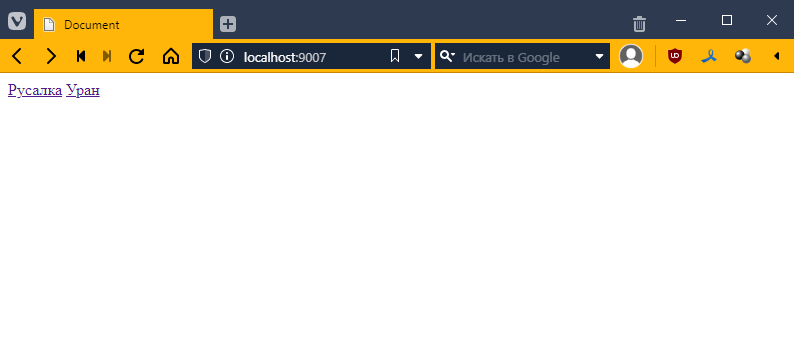
checking:
Ooh! The menu is now everywhere, even twice on the main page. Let’s write something there:
{% extends “__layout.twig” %}

{% block content %}
I am the main page
{% endblock %}
And in the template, let’s add a link to the main page
<div>
    <a href="/">Home</a> <!-- added -->
    <a href="/mermaid">Mermaid</a>
    <a href="/uranus">Uranus</a>
</div>
{% block content %}
    emptiness
{% endblock %}
Oh, like this:
Passing data to the template
Before we do anything, let’s rename our templates to twig format so that the plugin for Twig works properly
and change the following in index.php:
$url = $_SERVER[“REQUEST_URI”];

if ($url == “/”) {
    echo $twig->render(“main.twig”);
} elseif (preg_match(“#/mermaid#”, $url)) {
    echo $twig->render(“mermaid.twig”);
} elseif (preg_match(“#/uranus#”, $url)) {
    echo $twig->render(“uranus.twig”);
}
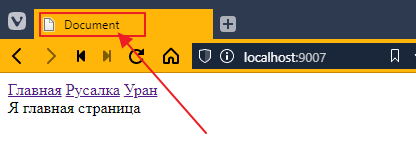
We can pass data to any template in the form of a dictionary. For example, our page is always called Document
Let’s pass the page name to our router (I call our if statements that decide which template to render a router)
if ($url == “/”) {
    echo $twig->render(“main.twig”, [
        “title” => ‘Home’ // in square brackets, we create a dictionary with the key title and the value “Home”
    ]);
} elseif (preg_match(“#/mermaid#”, $url)) {
    echo $twig->render(“mermaid.twig”, [
        “title” => “Mermaid”
    ]);
} elseif (preg_match(“#/uranus#”, $url)) {
    echo $twig->render(“uranus.twig”, [
        “title” => “Uranus”
    ]);
}
Now let’s connect this value in the template. Go to __layout.twig and instead of Document, insert:
<!DOCTYPE html>
<html lang="en">
<head>
    <meta charset="UTF-8">
    <meta http-equiv=“X-UA-Compatible” content="IE=edge">
    <meta name="viewport" content="width=device-width, initial-scale=1.0">
    <title>{{ title }}</title> <!-- replaced Document with {{ title }}-->
</head>
<body>
   <!-- ... -->
That is, in double curly brackets, we specify the key value that we would like to display.
Let’s look at the tab title.
Beautiful! =)
In general, we now have a lot of copy-paste in index.html, so let’s refactor our code a little:
// ...
$url = $_SERVER[“REQUEST_URI”];

// added two variables
$title = “”;
$template = “”;

// now I just fill in the values of the variables
if ($url == “/”) {
    $title = “Home”;
    $template = “main.twig”;
} elseif (preg_match(“#/mermaid#”, $url)) {
    $title = “Mermaid”;
    $template = “mermaid.twig”;
} elseif (preg_match(“#/uranus#”, $url)) {
    $title = “Uranus”;
    $template = “uranus.twig”;
}

// rendering is done once based on the filled variables
echo $twig->render($template, [
    “title” => $title
]);
Summarizing pages with images
Now let’s look at pages with images. They are basically no different, except for the image address. So let’s make one template for images:
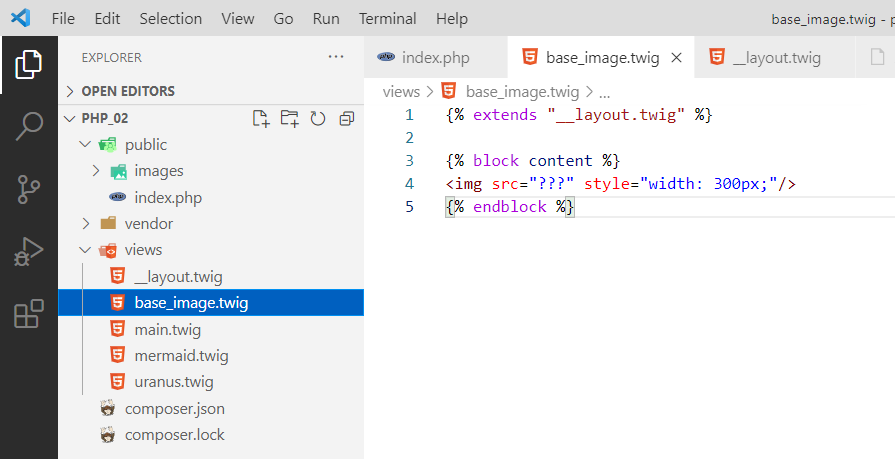
The only question is what to write in the address?
In general, you can create a variable for the image, like this:
$title = “”;
$template = “”;
$image = “”; // added a variable

if ($url == “/”) {
    $title = “Home”;
    $template = “main.twig”;
} elseif (preg_match(“#/mermaid#”, $url)) {
    $title = “Mermaid”;
    $template = “base_image.twig”; // now we use the base_image template
    $image = “/images/mermaid.jpg”; // fill in
} elseif (preg_match(“#/uranus#”, $url)) {
    $title = “Uranus”;
    $template = “base_image.twig”; // base_image here too
    $image = “/images/uranus.png”; // fill in here too
}

echo $twig->render($template, [
    “title” => $title,
    “image” => $image, // pass
]);
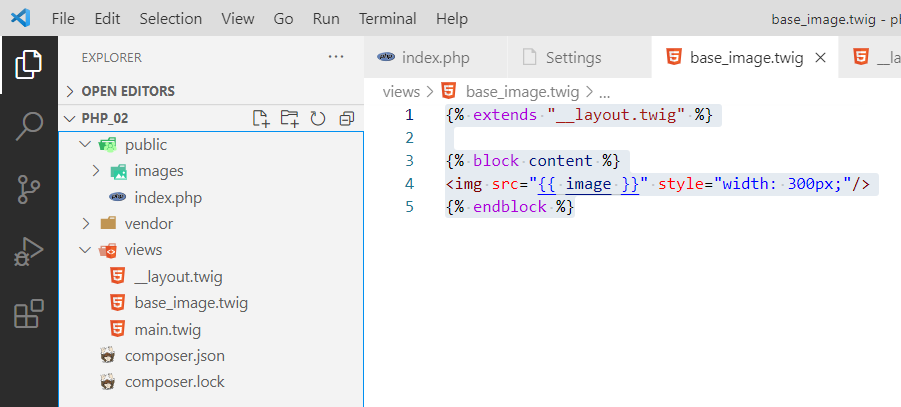
Now you can hook into the base_image.twig template:
{% extends “__layout.twig” %}

{% block content %}
<img src="{{ image }}" style="width: 300px;"/>
{% endblock %}
Let’s test it:
You can delete separate templates for the mermaid and uranium:
Everything seems to be OK, except that the image is also transferred to the main page, even though it is not needed there. This is not very good from an architectural point of view.
So let’s do it a little differently. We will create an empty dictionary that will be filled with the necessary key-values as needed, like this:
// ...
$url = $_SERVER[“REQUEST_URI”];

$title = “”;
$template = “”;
// $image = “”; remove

$context = []; // our dictionary, data for the template is commonly referred to as context

if ($url == “/”) {
    $title = “Home”;
    $template = “main.twig”;
} elseif (preg_match(“#/mermaid#”, $url)) {
    $title = “Mermaid”;
    $template = “base_image.twig”;

    $context[‘image’] = “/images/mermaid.jpg”; // pass the image key to the context
} elseif (preg_match(“#/uranus#”, $url)) {
    $title = “Uranus”;
    $template = “base_image.twig”;

    $context[‘image’] = “/images/uranus.png”; // and here we pass the image key to the context
}

// I don't put the name in the context in the router,
// because it's a separate entity, common to all
$context[‘title’] = $title;

// and then I render it
echo $twig->render($template, $context);
Isn’t that wonderful! =)
Как делать задание 6
As I mentioned earlier, virtually all modern web applications are based on MVC architecture. At this point, we have only more or less identified the V component, which stands for View, or template, if that is easier to understand.
If you wrote code similar to mine, you should have ended up with a two-level structure in the router

Alternatively, you could have done without nested if statements, but then you would have had to duplicate the code responsible for the galaxy name, general object description, and image

In general, both approaches are equally bad. They are inconvenient to read and unpleasant to write.
We will take the best of these two approaches. The flat structure from the second and the hierarchy from the first. To do this, we will use the ability to create classes in PHP.
Classes will allow us to remove code from if statements and build an inheritance hierarchy. For example, the general page for Andromeda has the name “Andromeda Galaxy,” and the page with the image has the same name, but it also displays information about the image.
Creating controllers
So, let’s create a controllers folder and a BaseController file in it.

Let’s write the following code in it
<?php
// abstract class so that no instance can be created
abstract class BaseController {
    // since everything revolves around data, let's create a function
    // that will return the context with data
    public function getContext(): array {
        return []; // empty context by default
    }

    // the get function will call the rendering directly
    // since it is not necessary to render twig templates, but you can, for example, render any json
    // so we will make the method abstract, so that whoever inherits BaseController
    // must override this method
    abstract public function get();
}
Let’s create another class and call it TwigBaseController
<?php
require_once "BaseController.php"; // we must import BaseController

class TwigBaseController extends BaseController {
    public $title = ""; // page title
    public $template = ""; // page template
    protected \Twig\Environment $twig; // reference to the twig instance for rendering

    // now we write the constructor,
    // passing one parameter to it
    // actually a reference to the twig instance
    // this is called Dependency Injection, by the way
    // this is better than creating a global $twig object
    // and faster than creating a personal $twig handler for each class
    public function __construct($twig)
    {
        $this->twig = $twig; // pass it inside
    }

    // we override the context function
    public function getContext() : array
    {
        $context = parent::getContext(); // we call the parent method
        $context["title"] = $this->title; // we add title to the context

        return $context;
}

// get function, renders the result using $template as a template
// and calls the getContext function to form the context dictionary
public function get() {
    echo $this->twig->render($this->template, $this->getContext());
}
}
And you might be wondering, why so much code, abstractions, and all that?
Well, now we’re going to use these base classes to create controllers for all our types, and the code in the router will be way shorter, and it’ll be way easier to read and maintain.
Add a controller for the main page
Create a MainController controller for the main page.

And write in it… well, we’re not writing much at all =O.
<?php
require_once "TwigBaseController.php"; // import TwigBaseController

class MainController extends TwigBaseController {
    public $template = "main.twig";
    public $title = "Home";
}
Next, we go and make changes in the router:
<?php
require_once "../vendor/autoload.php";
require_once "../controllers/MainController.php"; // add a link to our controller at the very top

// ...

$context = [];

$controller = null; // create a variable for the controller

if ($url == "/") {
    $controller = new MainController($twig); // create a controller instance for the main page
} elseif (preg_match("#^/andromeda#", $url)) {
    // leave it alone for now ...
} elseif (preg_match("#^/orion#", $url)) {
    // and this too...
}

/* REMOVE
$context["title"] = $title;

echo $twig->render($template, $context);
*/

// check if the controller is not empty, then render the page
if ($controller) {
    $controller->get();
}
Testing:

It works the same way, but in the router itself, that is, inside the if statement there is only one line — creating an instance of the controller. Which can be considered a kind of achievement!
But a meager one, since there wasn’t much there before…
Adding the Andromeda page controller
Now let’s try to create an AndromedaController controller to display information about Andromeda.
We do this in the same way, essentially copying and pasting what was in the router.
That is, we specified the title, specified the template, and specified the page-specific keys/values in getContext().

Now let’s go back to index.php and write there:
<?php
require_once "../vendor/autoload.php";
require_once "../controllers/MainController.php";
require_once "../controllers/AndromedaController.php"; // don't forget to add import

// ...

$controller = null;

if ($url == "/") {
    $controller = new MainController($twig);
} elseif (preg_match("#^/andromeda#", $url)) {

    $controller = new AndromedaController($twig); // here we just create a controller

    // don't touch image and info yet
    if (preg_match("#^/andromeda/image#", $url)) {
        // ...
    } elseif (preg_match("#^/andromeda/info#", $url)) {
        // ...
    }
} elseif (preg_match("#^/orion#", $url)) {
    // ...
}

// ...
Let’s check:

It works the same way! =O
Adding the Andromeda image page controller
Now comes the most interesting part. We have an Andromeda page template with an image, which is essentially a basic page with Andromeda, plus additional properties.
So, within twig, we already have a two-level hierarchy. Now we create the same hierarchy at the controller level, that is, we create a controller that inherits not from TwigBaseController, but from AndromedaController. Like this:

Let’s edit index.php again
<?php
require_once "../vendor/autoload.php";
require_once "../controllers/MainController.php";
require_once "../controllers/AndromedaController.php";
require_once "../controllers/AndromedaImageController.php"; // added

// ...

$controller = null;

if ($url == "/") {
    $controller = new MainController($twig);
} elseif (preg_match("#^/andromeda#", $url)) {

    $controller = new AndromedaController($twig);

    if (preg_match("#^/andromeda/image#", $url)) {
        $controller = new AndromedaImageController($twig); // now AndromedaImageController here
    } elseif (preg_match("#^/andromeda/info#", $url)) {
        // ...
    }
} elseif (preg_match("#^/orion#", $url)) {
    // ...
}

// ...
Testing:

It works! =)
Add a controller for the Andromeda information page.
Similarly, create AndromedaInfoController.
<?php
require_once "AndromedaController.php";

class AndromedaInfoController extends AndromedaController {
    public $template = "andromeda_info.twig";

    public function getContext(): array
    {
        $context = parent::getContext();

        // ...

        return $context;
    }
}
and connect it in index.php:
<?php
require_once "../vendor/autoload.php";
require_once "../ controllers/MainController.php";
require_once "../controllers/AndromedaController.php";
require_once "../controllers/AndromedaImageController.php";
require_once "../controllers/AndromedaInfoController.php"; // added

// ...

$controller = null;

if ($url == "/") {
    $controller = new MainController($twig);
} elseif (preg_match("#^/andromeda#", $url)) {
    $controller = new AndromedaController($twig);
    if (preg_match("#^/andromeda/image#", $url)) {
        $controller = new AndromedaImageController($twig);
    } elseif (preg_match("#^/andromeda/info#", $url)) {
        $controller = new AndromedaInfoController($twig); // now only AndromedaInfoController here too
    }
} elseif (preg_match("#^/orion#", $url)) {
   // ...
}

// ...
And now, if you look, we no longer need the nested if for Andromeda!
And we can make the router structure flat, at least for Andromeda, like this:
if ($url == "/") {
    $controller = new MainController($twig);
} elseif (preg_match("#^/andromeda/image#", $url)) {
    $controller = new AndromedaImageController($twig);
} elseif (preg_match("#^/andromeda/info#", $url)) {
    $controller = new AndromedaInfoController($twig);
} elseif (preg_match("#^/andromeda#", $url)) {
    $controller = new AndromedaController($twig);
} elseif (preg_match("#^/orion#", $url)) {
    // ...
}
Just note that I changed the order of checking for matches with the URL so that more specific templates (with image or info) come before more general ones (like #^/andromeda#).
Well, I think you can do the second object yourself. But before you start,
Create a 404 page
Let’s also create a 404 page, which is a page that appears when a link to a page does not exist (in our case, for example, if the controller is not defined).
Let’s create a controller and name it Controller404.php and write some simple code in it:
<?php
require_once "TwigBaseController.php";

class Controller404 extends TwigBaseController {
    public $template = "404.twig";
    public $title = "Page not found";
}
I wrote the template 404.twig there. Let’s create it in the views folder:

and put something like this in it
{% extends "__layout.twig" %}

{% block content %}

<div class="text-center">
    <img src="/images/025_picture-47918.gif" alt="">
    <div>
        Page not found! What to do!!!111 =O
    </div>
</div>

{% endblock %}
Okay, let’s connect it in index.php
<?php
// ...
require_once "../controllers/AndromedaInfoController.php";
require_once "../controllers/Controller404.php"; // added

// ...
$context = [];

$controller = new Controller404($twig); // now 404 will be our default controller

if ($url == "/") {
// ...
Since I haven’t made controllers for Orion yet, in theory, when I click on the Orion page, I should call this controller. Let’s try it:

There’s one more thing: our 404 page isn’t quite real. Not because I didn’t write 404 on it, but because the response code that comes with this page is not 404, but 200.
You can view the response code as follows. Press F12 or Ctrl+Shift+I in your browser, find the Network tab, and find the very first request there:

What you see in the Status column is the page return code. To make it a real 404, you need to add a call to the special http_response_code function to the controller:
<?php
require_once "TwigBaseController.php";

class Controller404 extends TwigBaseController {
    public $template = "404.twig";
    public $title = "Page not found";

    public function get()
    {
        http_response_code(404); // use http_response_code to set the return code to 404
        parent::get(); // call the base method get(), which will actually render the page
    }
}
Let’s run it again and look at the status column once more:

Now that’s a different story!)
Как делать задание 7
So let’s dig a little deeper into our second project.
Adding an active class
Remember in the third task, we had to highlight the active item in the menu, and there we used <?= $is_image ? "active" : "" ?>.
Now let’s see how to do this in Twig. In principle, you can use a conditional operator.
For example, I want the “active” class to be added to the main page. This is done as follows:
<div>
    <a href="/" class="{% if title == "Home" %}active{% endif %}">Home</a>
    <a href="/mermaid">Mermaid</a>
    <a href="/uranus">Uranus</a>
</div>
It looks a little simpler than in pure PHP, but it’s still cumbersome.
Fortunately, in Twig, this construction can be written in a simplified form using a ternary operator, like this:
<div>
    <a href="/" class="{{ title == "Home" ? "active" : "" }}">Home</a>
    <a href="/mermaid">Mermaid</a>
    <a href="/uranus">Uranus</a>
</div>
Since this is a single-line operation, double curly brackets {{ ... }} are used here.
In fact, there is an even simpler form of notation, like this:
<div>
    <a href="/" class="{{ title == "Home" ? "active" }}">Home</a>
    <a href="/mermaid">Mermaid</a>
    <a href="/uranus">Uranus</a>
</div>
That is, if you put an empty string after the colon, you don’t have to write it out.
Forming navigation dynamically
Currently, our navigation is done manually, i.e. we write each link directly in the markup. This is fine when there are few menu items, but it creates problems when there are many of them and each one needs to be styled in some way.
For this purpose, Twig has a built-in ability to create elements in a loop. That is, you have a list of menu items, and in the template, you simply go through this list and dynamically create elements. And even if you have 100 menu items, you only write the markup for one.
Let’s make a list for the menu in index.php, like this:
// ...
$title = "";
$template = "";

$context = [];
$menu = [ // added a list of dictionaries
    [
        "title" => "Home",
        "url" => "/",
    ],
    [
        "title" => "Mermaid",
        "url" => "/mermaid",
    ],
    [
        "title" => "Uranus",
        "url" => "/uranus",
    ]
];
// ...
Now let’s put this into context:
// ...
$context["title"] = $title;
$context["menu"] = $menu; // pass the menu to context

echo $twig->render($template, $context);
and update the __layout.twig template so that it creates a menu based on this list:
<body>
    <!-- REMOVE THIS
    <div>
        <a href="/">Home</a>
        <a href="/mermaid">Mermaid</a>
        <a href="/uranus">Uranus</a>
    </div>-->

    <div> <!-- add a loop for all menu items -->
        {% for item in menu %}
            <!--since item is a dictionary with two keys, use them to output the link -->
            <a href="{{item.url}}">{{item.title}}</a>
        {% endfor %}
    </div>

    {% block content %}
        empty
    {% endblock %}
</body>
Plus, you can check for an active element right here:
<div>
    {% for item in menu %}
        <a href="{{item.url}}" class="{{ title == item.title ? "active" }}">{{item.title}}</a>
    {% endfor %}
</div>
Let’s add some style to the active link to make it more visible:
<!DOCTYPE html>
<html lang="en">
<head>
     <!-- ... -->
    <style>
        /* added style */
        a.active {
            background-color: yellow;
        }
    </style>
</head>
<body>
    <div>
        {% for item in menu %}
            <a href="{{item.url}}" class="{{ title == item.title ? "active" }}">{{item.title}}</a>
        {% endfor %}
    </div>

    <!-- ... -->
</body>
</html>
and let’s test it:

It works! =)
Multi-level template inheritance
According to the task, you have a main template and an object template that inherits from the main template. This object template must be inherited by templates that specify the display of the template object.
Let’s say I want some phrase that uses $title to be written for objects, something like this:

Let’s try to inherit the base_image template from __object so that we have the inscription at the top and the image as well. Let’s try this first:
{% extends "__object.twig" %}

{% block content %}
<img src="{{ image }}" style="width: 300px;"/>
{% endblock %}
Let’s see:

Hmm, for some reason nothing has changed…
What’s the problem?
The problem is that our base_image template overrides the contents of the {% block content %}{% endblock %} block, and because of this, the phrase that is present in the __object template is lost.
Therefore, when you do two-level inheritance, you need to define a new block inside the content block with a different name inside the new template, in our case __object. Like this:
{% extends "__layout.twig" %}

{% block content %}
    <div>
        {{title}} -- a wonder of nature
    </div>

    {% block objectContent %}
    {% endblock %}
{% endblock %}
You can use anything you want as the name objectContent. I decided to name it that, but you can choose something else. But the point is that now in base_image.twig you must override the content not with {% block content %}{% endblock %} but with {% block objectContent %}{% endblock %}, as follows
{% extends "__object.twig" %}

{% block objectContent %}<!-- changed content to objectContent here -->
<img src="{{ image }}" style="width: 300px;"/>
{% endblock %}
Let’s see:

That’s what we need)
It is clear that in this example, such a hierarchy is redundant. But if you have a set of menu items for Uranus, this is exactly what you need.
What should happen
Now we can return to the main project. The question immediately arises of how to connect everything and how to write the code. It should look something like this:
