Let’s start with some history. Back in the day, when the web was still in its early stages of rapid development in the early 2000s and PHP was the main player in the web language market, people wrote code in it any way they wanted.
That’s when the negative attitude towards PHP developers as mostly low-skilled programmers started. The entry threshold was very low, websites were just a bunch of unrelated PHP files, and the code was scary to look at.
Fortunately, the web evolved, PHP evolved, and along with them, the requirements for developers grew, followed by the requirements for web application design. MVC architecture and its friends became the norm.
Therefore, we will try to quickly get through the stage of naive programming in PHP and move on to MVC architecture as quickly as possible.
Adding a new page
Let’s take a look at our project. We currently have one file there. Usually, websites have many different links. Let’s try to go to a link, for example, http://localhost/hello.
In response, we will get a 404 error.
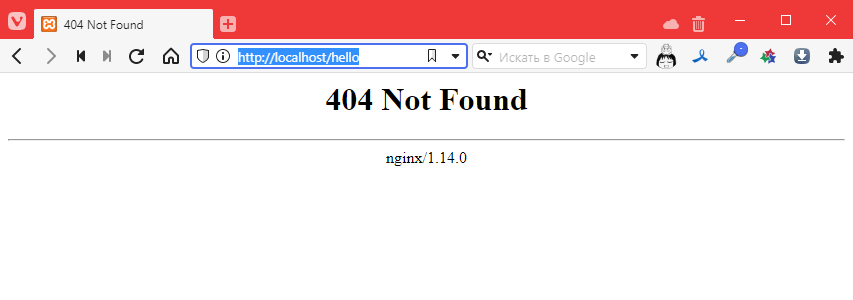
This means that the file does not exist. This is predictable, of course, but it’s disappointing.
So let’s add a file called hello.php with the following content:
<!DOCTYPE html>
<html lang="en">
<head>
    <meta charset="UTF-8">
    <meta http-equiv="X-UA-Compatible" content="IE=edge">
    <meta name="viewport" content="width=device-width, initial-scale=1.0">
    <title>Document</title>
</head>
<body>
    I'm a new page!!!1111 =)
</body>
</html>
Let’s try again http://localhost/hello
Hmm, still 404
What if we use this URL: http://localhost/hello.php
Oh! It worked! So it turns out that after http://localhost/ we need to specify the path to the php file. Okay…
Adding an image
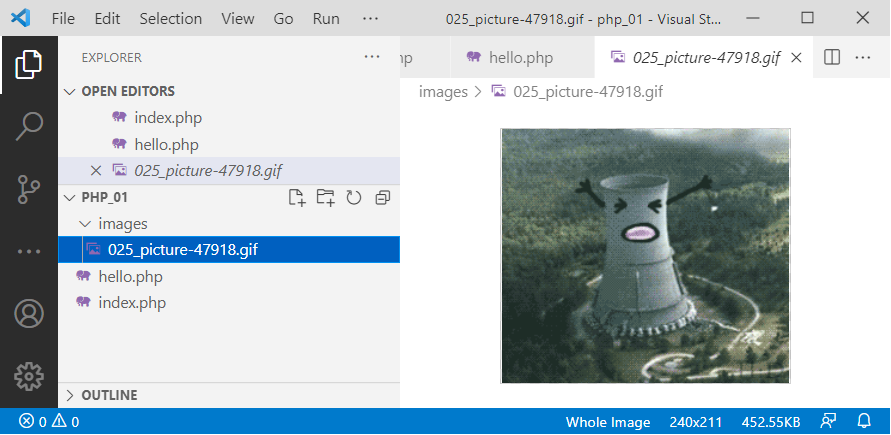
Let’s try adding an image. And let’s do it so that it’s stored on our server. Here’s one, for example:

Save it in the folder where the file is located, and it’s better to create a subfolder called images, like this:
Now let’s connect it to the new page. To do this, we need to specify its path relative to the project folder. And the path MUST start with a forward slash / like this:
<!DOCTYPE html>
<html lang="en">
<head>
    <!-- … -->
</head>
<body>
    I'm a new page!!!1111 =)
    <br>
    <img src="/images/025_picture-47918.gif" alt="">
</body>
</html>
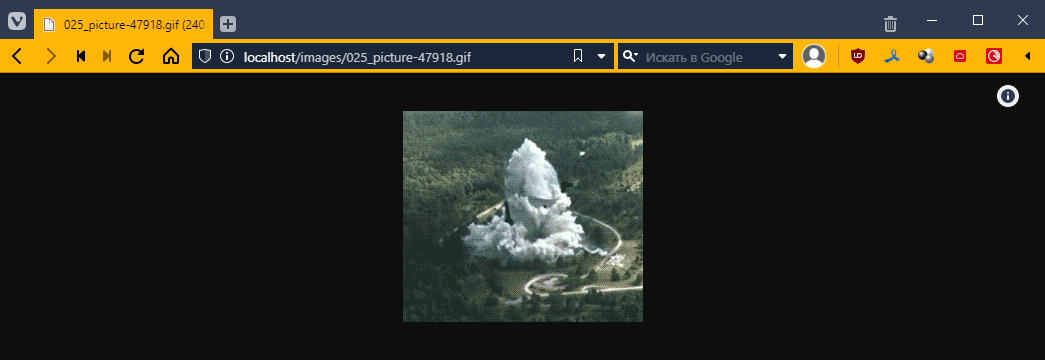
Let’s check:
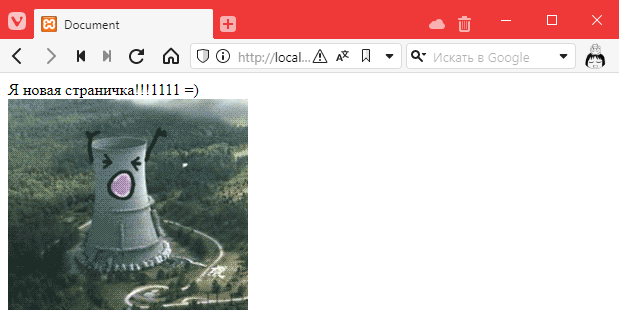
Hooray! =)
But then the question arises: why did PHP understand that this is an image and not interpret the file? After all, we can even open it via a direct link http://localhost/images/025_picture-47918.gif
What’s more, we can even open the folder (if we ran it on Linux via a local server): http://localhost/images/
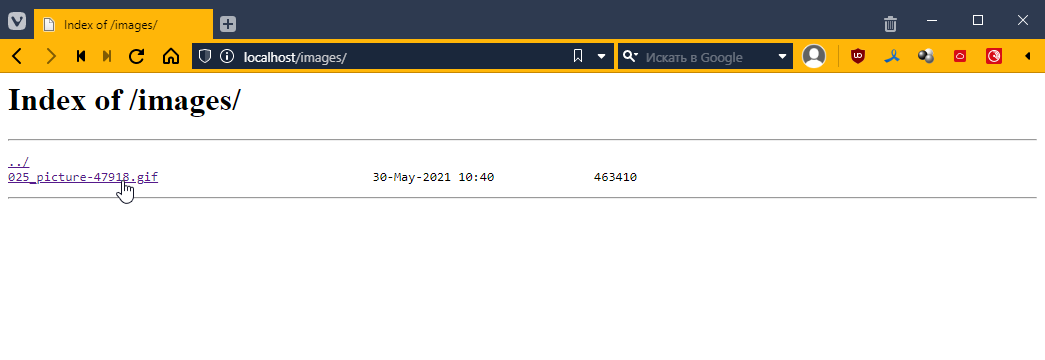
And this, comrades, is a security hole. Is php really doing all this?
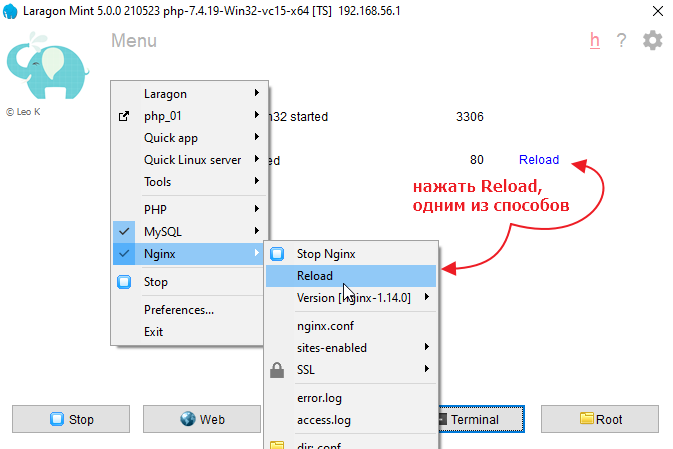
Configuring Nginx
If you are using Linux, you may skip this section.
However, this is not the case. In reality, it is not PHP that performs this task. In fact, when we write http://localhost/images/, requests do not go to PHP, but first to the Nginx web server (engine x — pronounced “nginx” in Russian, but for some reason I say “nginx”… it’s spelled the way it’s pronounced).
This is a special program that is not generally designed to execute any code; its main task is to redirect requests to different interpreters and distribute files. And it does this so masterfully that it can simultaneously serve tens of thousands of connections and distribute thousands of files. For which everyone loves it dearly *_*
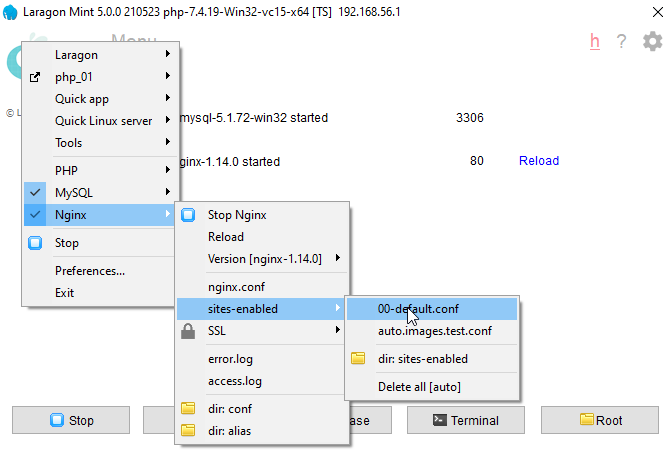
Let’s take a look at the settings of this very nginx
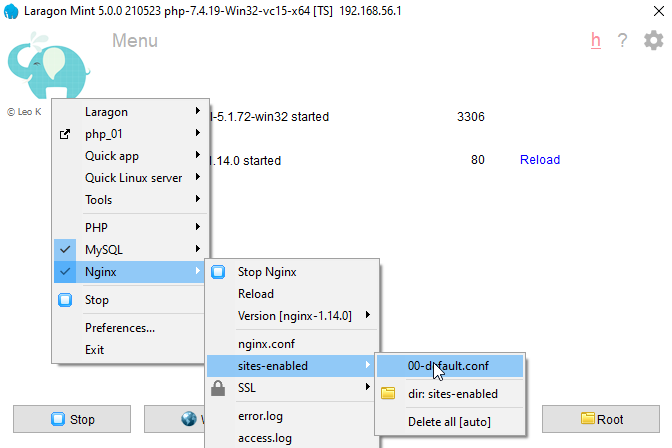
Since nginx can serve several sites at once, in the sites-enabled block, we can choose which site we want to configure. Since we are working with only one project and have not made any additional settings, we select 00-default.con, where we will see:
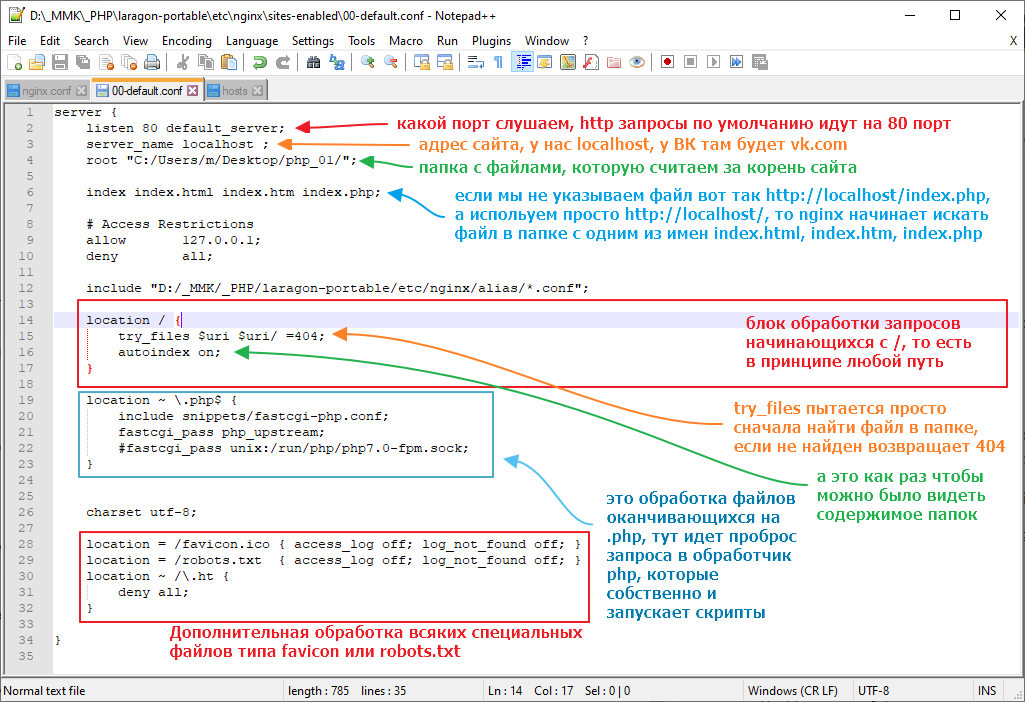
In general, the first thing we need to do is disable autoindex. You can set the value to off or simply comment out the line like this:

Now we need to restart nginx.
Let’s check:
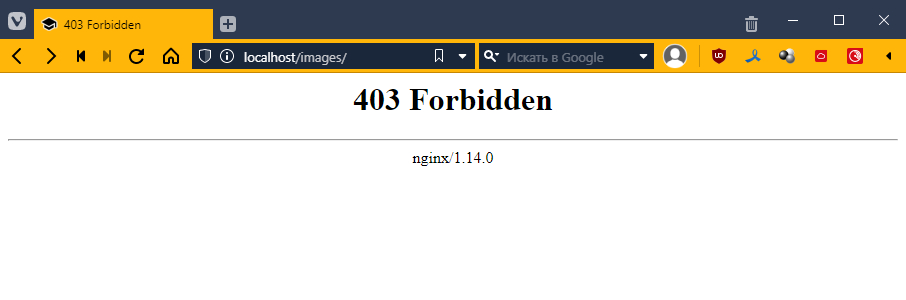
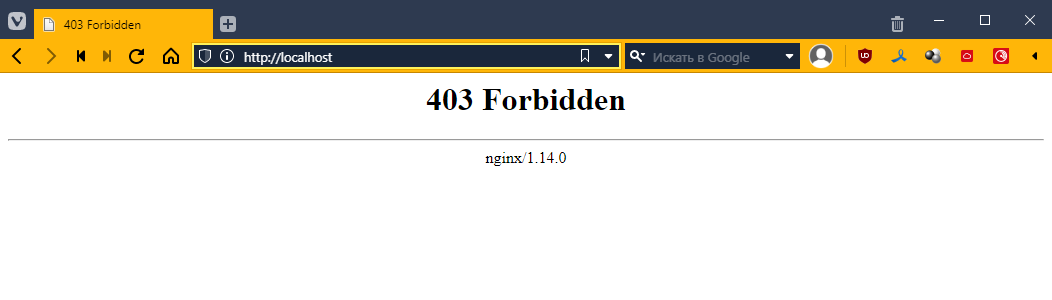
Forbidden — that is, prohibited, which is what we want =)
Now let’s do one more thing that may seem strange, but we will make it so that all requests, if the file is not found, go to index.php. To do this, we will correct the line with try_files:
We will write there
try_files $uri $uri/ /index.php$is_args$args;

Restart nginx again
Now let’s try to go to a page like http://localhost/page/about
Ideally, we should be redirected to index.php.
Let’s check:
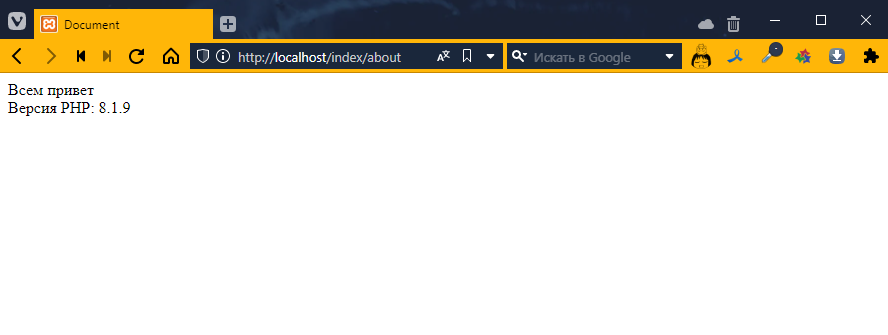
Perfect! =)
Let’s find out the request URL
What did this give us? It means that we now control all requests that do not go directly to regular files using a single index.php, which in turn allows us to manage the application in a more centralized manner.
Let’s take a look at how we can use the link information inside our index.php file
So, every time a php file is launched, it has access to a list of predefined variables https://www.php.net/manual/ru/reserved.variables.php
Let’s see what happens when we open a page with different addresses. Add the following to index.php:
<!DOCTYPE html>
<html lang="en">
<head>
    <!-- … -->
</head>
<body>
    <?php print_r($_SERVER) ?> <!-- added output of information about the $_SERVER variable -->
</body>
</html>
We will get this unreadable mess
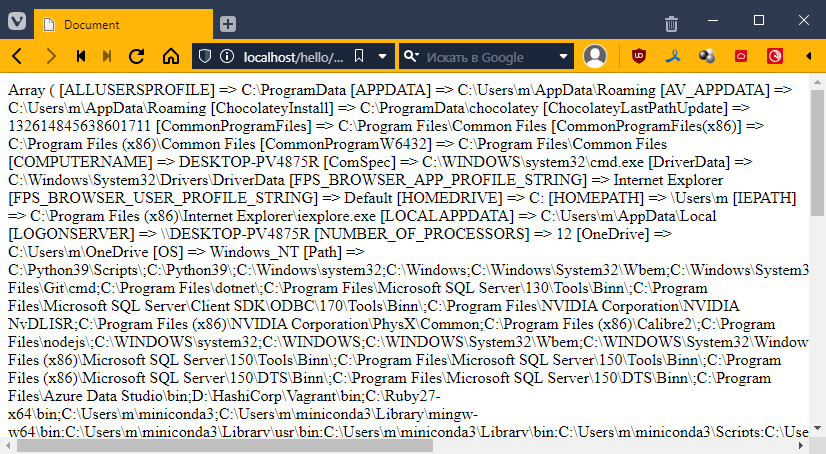
In fact, php formed a nice-looking response for us, but since the browser ignores all line breaks, it looks ugly.
You can even look at the page code (Ctrl+U) and see
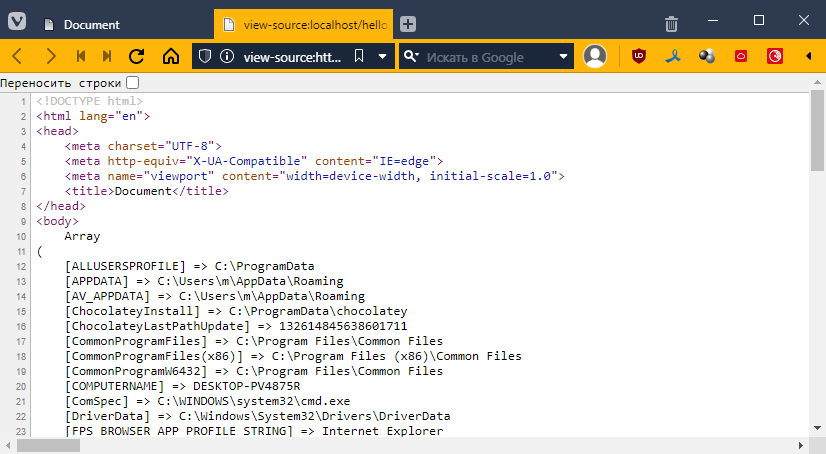
Fortunately, HTML has a special pre tag that takes into account all line breaks and indents. I use it to display code in all my articles. In general, we just take our PHP insert and wrap it with the tag.
<body>
<pre>
    <?php print_r($_SERVER) ?>
</pre>
</body>
Run it and scroll until you find the REQUEST_URI item.
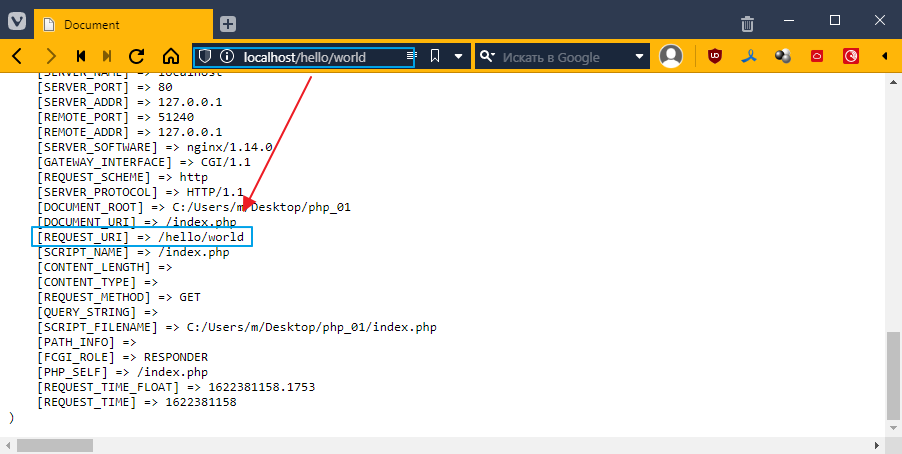
If you look closely, it says the same thing as in the browser line.
Let’s try to output this value separately.
$_SERVER is a dictionary, which means it has keys and values. To access it, use square brackets [], like this:
<body>
<pre>
    <?php print_r($_SERVER["REQUEST_URI"]) ?>
</pre>
</body>
Let’s see:
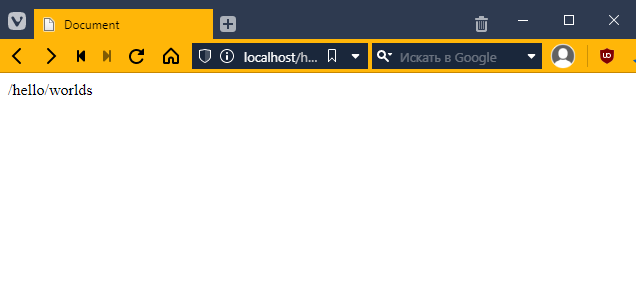
Cool! =) But what good is that to us?
Let’s try to create a menu. Let’s say I have a website about galaxies and nebulae in the universe. Let’s say I have three pages. For example:
- Home
- Andromeda Galaxy
- Orion Nebula
Let’s create the menu.
Connecting Bootstrap
I will use Bootstrap. Go to the website https://getbootstrap.com/docs/5.2/getting-started/introduction/
and copy the CSS into the head file of index.php

It should look something like this
<!DOCTYPE html>
<html lang="en">
<head>
    <meta charset="UTF-8">
    <meta http-equiv="X-UA-Compatible" content="IE=edge">
    <meta name="viewport" content="width=device-width, initial-scale=1.0">
    <title>Document</title>
    <link href="https://cdn.jsdelivr.net/npm/bootstrap@5.2.0/dist/css/bootstrap.min.css" rel="stylesheet" integrity="sha384-gH2yIJqKdNHPEq0n4Mqa/HGKIhSkIHeL5AyhkYV8i59U5AR6csBvApHHNl/vI1Bx" crossorigin="anonymous">
</head>
<body>
    <?php print_r($_SERVER["REQUEST_URI"]) ?>
</body>
</html>
Now we need to insert the navigation menu. Again, you can copy it from the Bootstrap website. Go here https://getbootstrap.com/docs/5.2/components/navbar/#nav
and paste it into the body
<nav class="navbar navbar-expand-lg navbar-light bg-light">
    <div class="container">
        <a class="navbar-brand" href=""#>Navbar</a>
        <button class="navbar-toggler" type="button" data-bs-toggle="collapse" data-bs-target="#navbarNav" aria-controls="navbarNav" aria-expanded="false" aria-label="Toggle navigation">
        <span class="navbar-toggler-icon"></span>
        </button>
        <div class="collapse navbar-collapse" id="navbarNav">
        <ul class="navbar-nav">
            <li class="nav-item">
            <a class="nav-link active" aria-current="page" href=""#>Home</a>
            </li>
            <li class="nav-item">
            <a class="nav-link" href=""#>Features</a>
            </li>
            <li class="nav-item">
            <a class="nav-link" href=""#>Pricing</a>
            </li>
            <li class="nav-item">
            <a class="nav-link disabled" href=""# tabindex="-1" aria-disabled="true">Disabled</a>
            </li>
        </ul>
        </div>
    </div>
</nav>
<?php print_r($_SERVER["REQUEST_URI"]) ?>
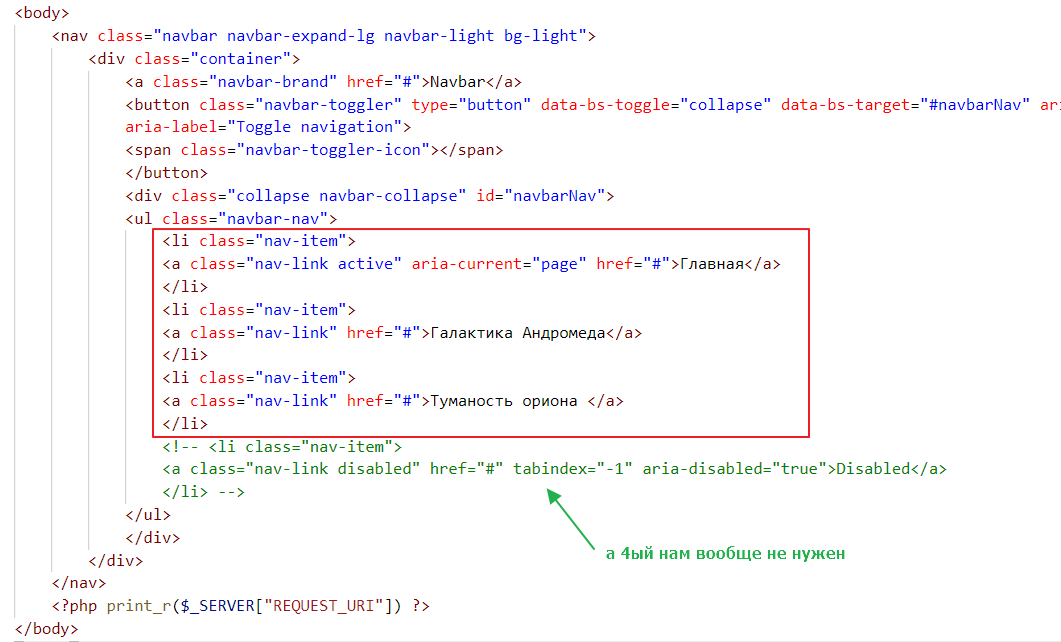
If we look closely, we can see that this block is responsible for the menu items
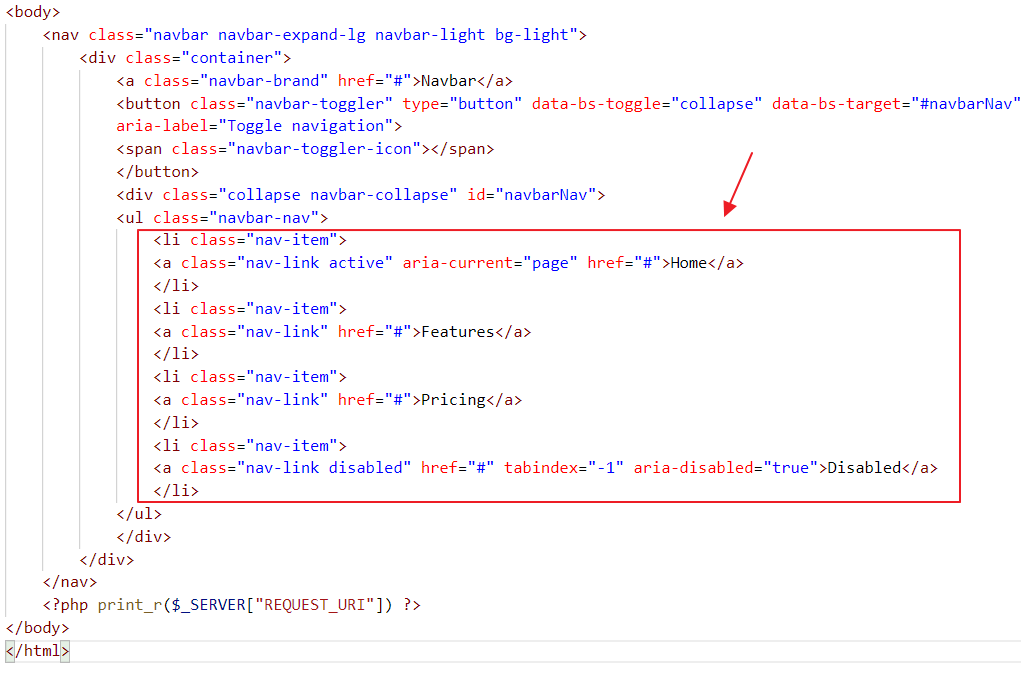
Let’s rewrite it so that only the items we need remain:
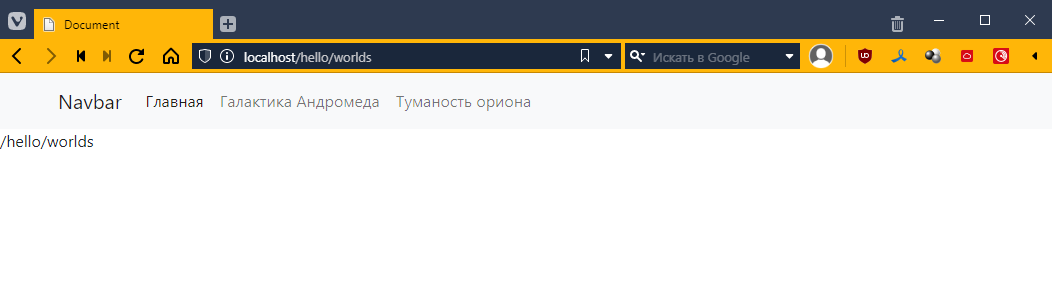
The result will be as follows:
To align our /hello/words with the navigation, let’s wrap our instruction in the .container class, which is a special class in Bootstrap that adds margins around the edges. It is responsive, meaning that the margins are larger on larger screens, smaller on smaller screens, and may be absent altogether on phones.
Like this:
<nav class="navbar navbar-expand-lg navbar-light bg-light">
    <!-- ... -->
</nav>
<div class="container">
    <?php print_r($_SERVER["REQUEST_URI"]) ?>
</div>
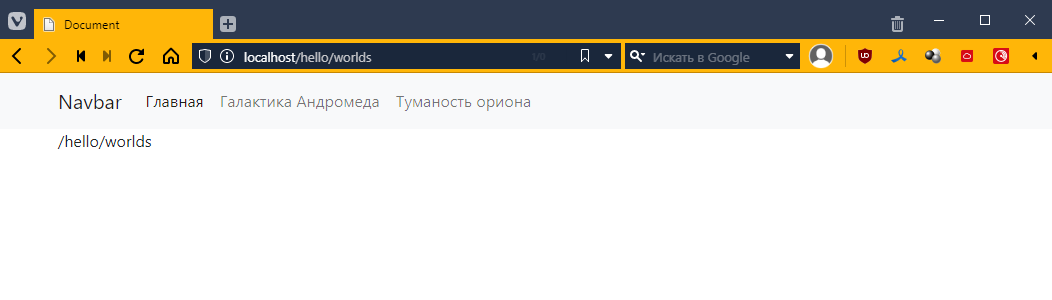
Now it looks better
By the way, this Navbar inscription is actually a place for the site logo. Let’s connect fontawesome and put some icon there.
<head>
    <!-- ... -->
    <link href="https://cdnjs.cloudflare.com/ajax/libs/font-awesome/6.1.2/css/all.min.css"  rel="stylesheet" />
</head>
<body>
    <nav class="navbar navbar-expand-lg navbar-light bg-light">
        <div class="container">
            <!-- here, instead of Navbar, I put <i class="fas fa-meteor"></i> -->
            <a class="navbar-brand" href=""#><i class="fas fa-meteor"></i></a>
            <button class="navbar-toggler" type="button" data-bs-toggle="collapse" data-bs-target="#navbarNav" aria-controls="navbarNav" aria-expanded="false" aria-label="Toggle navigation">
            <span class="navbar-toggler-icon"></span>
            </button>
            <div class="collapse navbar-collapse" id="navbarNav">
            <ul class="navbar-nav">
                <!-- ... -->
            </ul>
            </div>
        </div>
    </nav>
    <div class="container">
        <?php print_r($_SERVER["REQUEST_URI"]) ?>
    </div>
</body>
Let’s check:

Now let’s make it so that when we click on different menu items, different text appears at the bottom. In principle, it’s quite simple. All we need to do is write the URL for each menu item. We write:
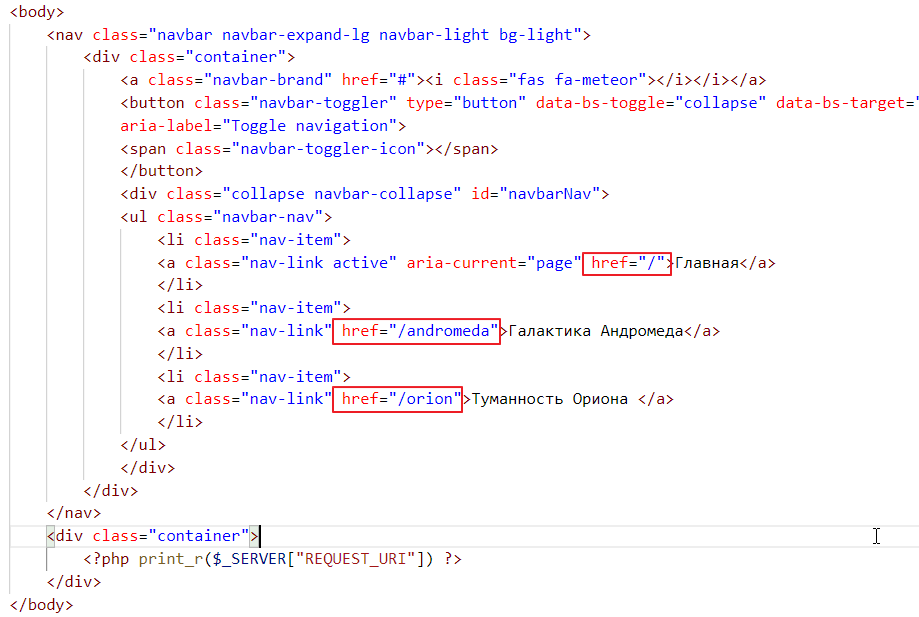
Now let’s try clicking:
Great! =)
Formally, we are not switching pages, but it looks as if we are. Don’t let that confuse you; this is how 99% of websites in the world work.
Managing content
Now let’s try to display something. For example, the main page will have a list of links to all pages (sort of like duplicating the navigation), and the nebula pages will have pictures.
Method #1
This is the worst way to do it, never do it this way, but in principle it is the most natural. We will simply check the value of the variable $_SERVER["REQUEST_URI"] and, depending on the value, display one piece or another.
PHP does not limit us in this kind of writing, it supports if, and it is done like this:
<body>
    <nav class="navbar navbar-expand-lg navbar-light bg-light">
        <!-- ... -->
    </nav>
    <div class="container">
        <?php if ($_SERVER["REQUEST_URI"] == "/") { ?>
            You are on the main page! =)
        <?php } elseif ($_SERVER["REQUEST_URI"] == "/andromeda") { ?>
            Here we will tell you about the magical Andromeda Galaxy.
        <?php } elseif ($_SERVER["REQUEST_URI"] == "/orion") { ?>
            There was a cat, and he carried the galaxy in Orion's belt.
        <?php } ?>
    </div>
</body>
That is, we wrap the logic in <?php ... ?> and place the output in the browser as if it were the body of an if statement.
It kind of works, but it’s very difficult to read and takes a long time to write.
Method #2
It’s about as poor as the first one, but there’s less to write. Instead of writing a bunch of PHP wrappers, you make one and put everything in it. It looks like this
<nav class="navbar navbar-expand-lg navbar-light bg-light">
    <!-- ... -->
</nav>
<div class="container">
    <?php
    if ($_SERVER["REQUEST_URI"] == "/") {
        echo "You are on the main page! =)<br>";
        echo "<b>And I can print the markup</b>";
    } elseif ($_SERVER["REQUEST_URI"] == "/andromeda") {
        echo "Here we will tell you about the magical Andromeda Galaxy";
    } elseif ($_SERVER["REQUEST_URI"] == "/orion") {
        echo "There was a cat, and he carried the galaxy in Orion's belt";
    }
    ?>
</div>
PHP has a special echo operator that inserts the specified text into the content of the HTML response, or more correctly, into the content of the web response, because the response is not always an HTML file; it can also be some kind of JSON or even an image, or just a simple file.
By the way, nothing prevents us from declaring variables and using them:
<?php
$url = $_SERVER["REQUEST_URI"]; // we put $ on the left side of the variable in PHP

if ($url == "/") { // and when accessing it too
    echo "You are on the main page! =)<br>";
    echo "<b>And I can print the markup</b>";
} elseif ($url == "/andromeda") {
    echo "Here we will tell you about the magical Andromeda Galaxy";
} elseif ($url == "/orion") {
    echo "There was a cat, and he carried the galaxy in Orion's belt";
}
?>
It may seem unusual to use the dollar sign, but there are advantages to it. In PHP, you can quickly insert a variable into a string, for example, like this:
<?php
$url = $_SERVER["REQUEST_URI"];

echo "You are on the page: $url, please be careful!<br>"; // the value $url will be substituted for url

if ($url == "/") {
    echo "You are on the main page! =)<br>";
    echo "<b>And I can print the markup</b>";
} elseif ($url == "/andromeda") {
    echo "Here we will tell you about the magical Andromeda Galaxy";
} elseif ($url == "/orion") {
    echo "There was once a cat, and he carried the galaxy in Orion's belt";
}
?>
It seems cool, but if you need to output at least a couple dozen lines, it will become impossible to read. Therefore:
Method #3
This is the most effective approach, at least if we are using basic PHP. The idea is to create separate files for subpages and display their content depending on the address.
Let’s create a separate folder called “views,” create three files in it, and put the page content in the files, like this:
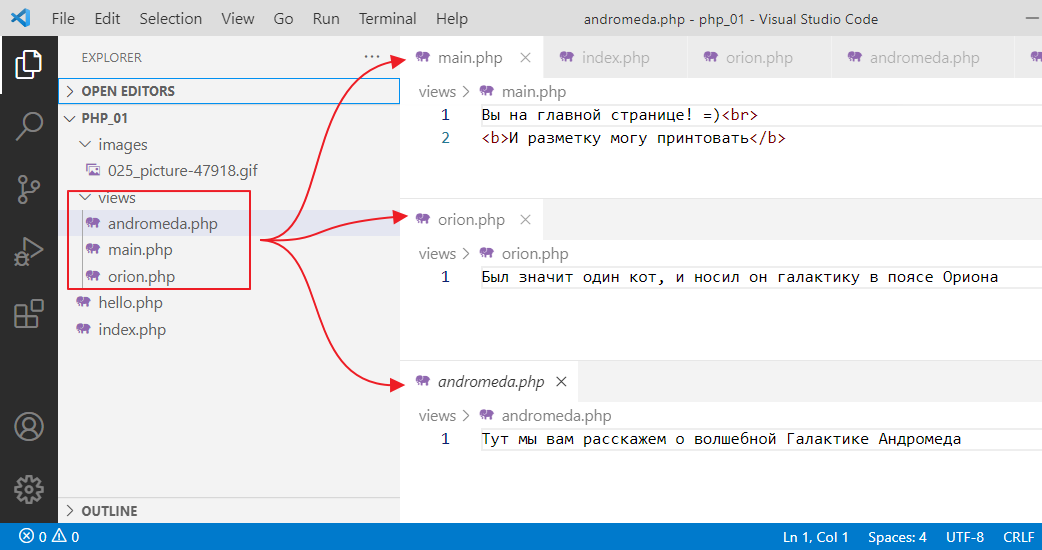
Now let’s make it so that our index.php displays the contents of these files depending on the URL. To do this, we will use another special operator, require, which simply takes and inserts what is inside the file specified after the operator:
<div class="container">
    <?php
    $url = $_SERVER["REQUEST_URI"];

    echo "You are on the page: $url, please be careful!<br>";

    if ($url == "/") {
        require "views/main.php";
    } elseif ($url == "/andromeda") {
        require "views/andromeda.php";
    } elseif ($url == "/orion") {
        require "views/orion.php";
    }
    ?>
</div>
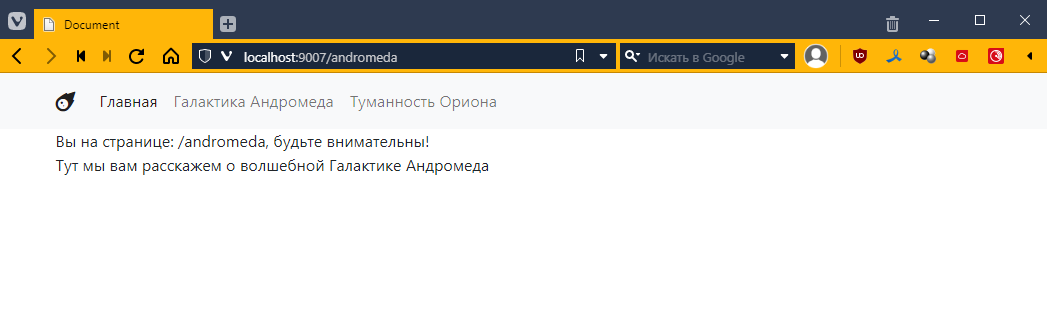
Let’s check:
It works the same way, but now we can create content of any complexity in separate files! =)
Configuring security
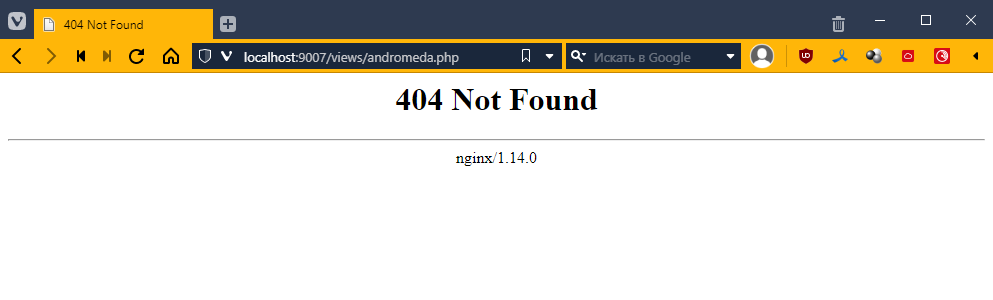
Another subtle point. Of course, everything works for us, and there are no errors, but in fact, there is a vulnerability in our code. A potential attacker could gain access to separate parts of our program.
For example, they could go to http://localhost/views/orion.php and see the contents of the orion.php file
What’s the big deal, you might ask? The thing is, when developing a real application, your files may contain information that you would not want to show to an outside user. Or some script that, when executed from outside index.php, may behave unpredictably.
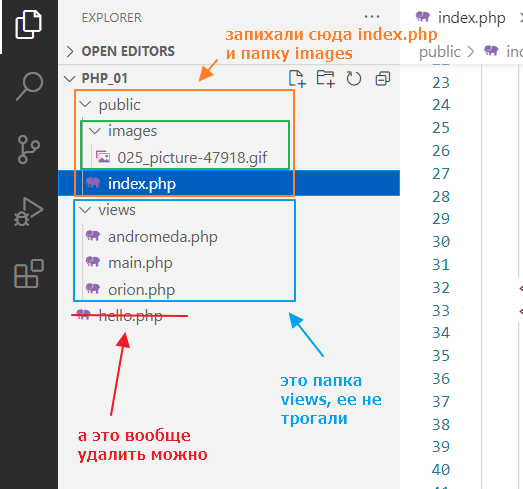
That’s why all modern web engines recommend creating a separate public folder to store index.php, all kinds of images, styles, and so on. Let’s configure our application to work this way:
Attempting to open http://localhost will give us
For Windows
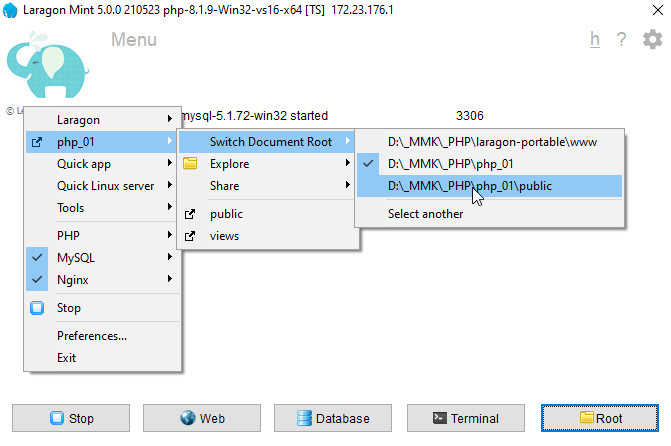
Now we need to configure Laragon to use the public folder as the root folder. Go to Laragon,
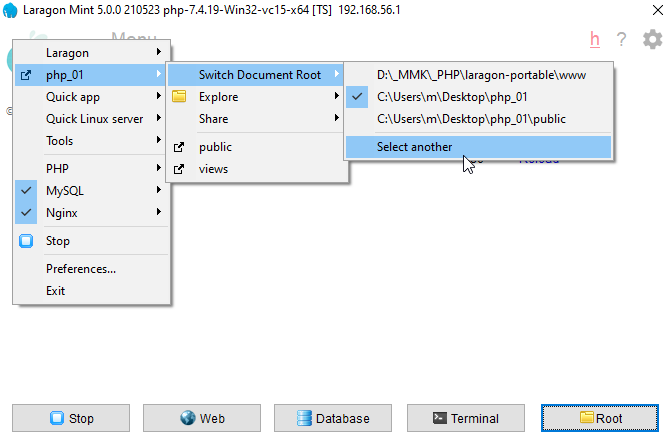
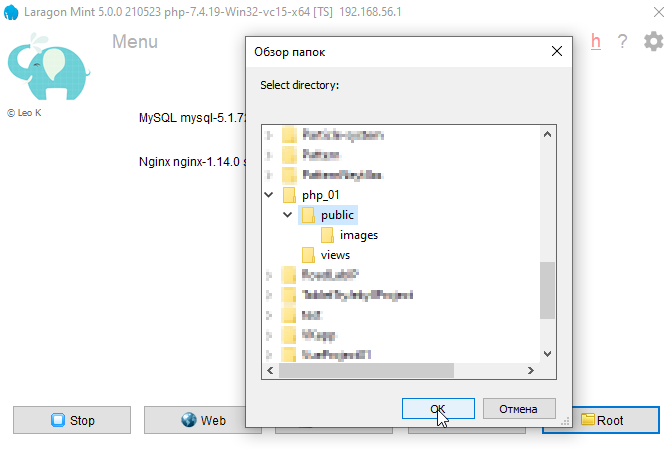
select the public folder
That seems to be all, but the problem is that Laragon has reset our nginx settings. Let’s go there and take a look:
Let’s see
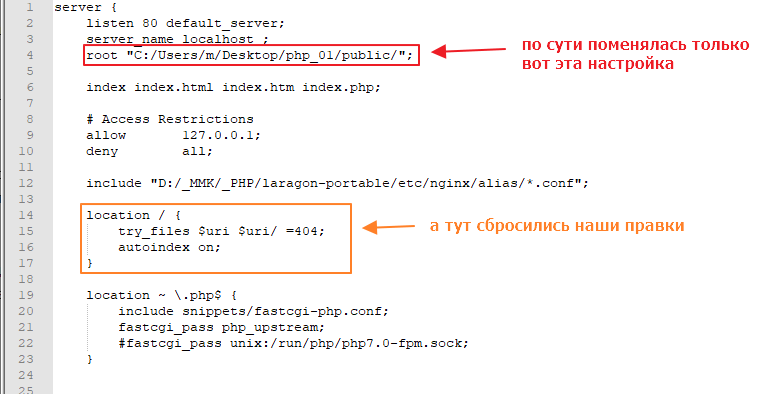
So that these settings are not lost, we need to tweak the Laragon template that it uses to recreate the 00-default.conf file when you switch folders. Go to the folder where you installed Laragon and go to /usr/tpl
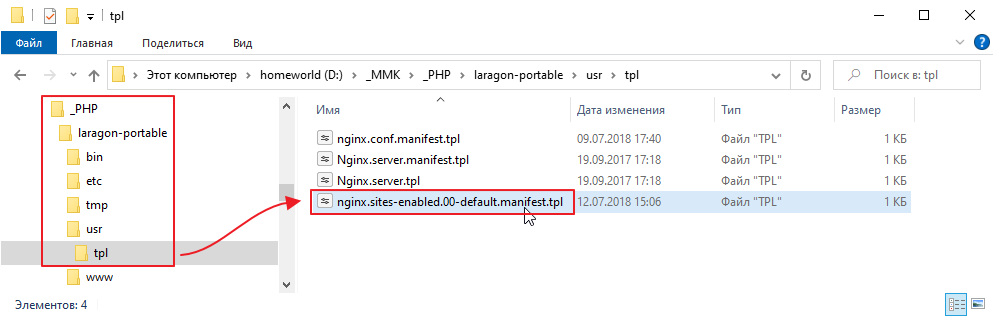
Open the file nginx.sites-enabled.00-default.manifest.tpl and edit its location so that it is the same as we configured last time:
server {
     ...

    location / {
        try_files $uri $uri/ /index.php$is_args$args; # added
        # and commented this out or you can delete it altogether
        #try_files $uri $uri/ =404;
        #autoindex on;
    }

   ...
}
Now switch back to php_01 and then back to php_01\public
On Linux
Just start the local server specifying the public folder
php -S localhost:3000 -t public
Testing
Let’s check:
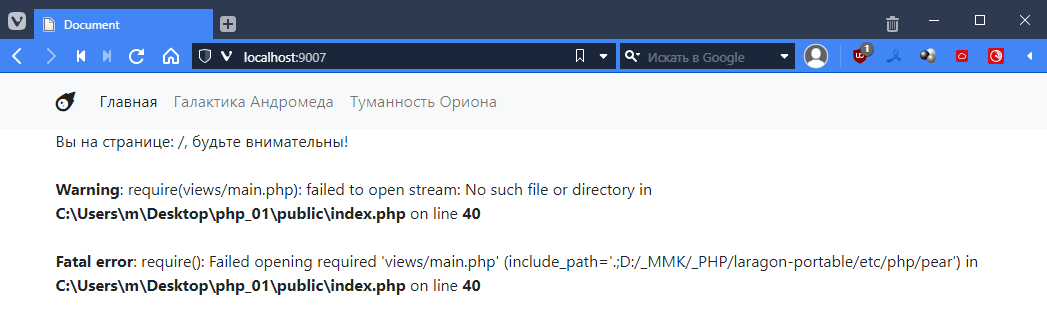
Hooray! It works! But there are a lot of errors. That’s understandable, because in index.php the paths are relative to index.php, and we need it to go to the folder above. So let’s go to index.php and fix it
<!DOCTYPE html>
<html lang="en">
<head>
    <!-- ... -->
</head>
<body>
    <nav class="navbar navbar-expand-lg navbar-light bg-light">
        <!-- ... -->
    </nav>
    <div class="container">
        <?php
        $url = $_SERVER["REQUEST_URI"];

        echo "You are on page: $url, please be careful!<br>";

        if ($url == "/") {
            require "../views/main.php"; // << added ../, which means search for the file in the folder one level above
        } elseif ($url == "/andromeda") {
            require "../views/andromeda.php"; // << and here
        } elseif ($url == "/orion") {
            require "../views/orion.php"; // and here
        }
        ?>
    </div>
</body>
</html>
Let’s test it.
Awesome! =)
And the best part is that now no one can view the contents of a separate php file.
That’s how it is *______*
Task
Let’s figure out how to process simple web requests and make a simple multi-page website.
Before you start this task, you need to come up with a theme for your website.
It could be characters, movies, music, instruments, cars, trees, flowers—whatever you like. The main thing is that you can match an image and some kind of description to this object. For now, two examples of your theme will suffice.
I chose the theme of cosmic nebulae. My test subjects are the Andromeda Galaxy and the Orion Nebula.